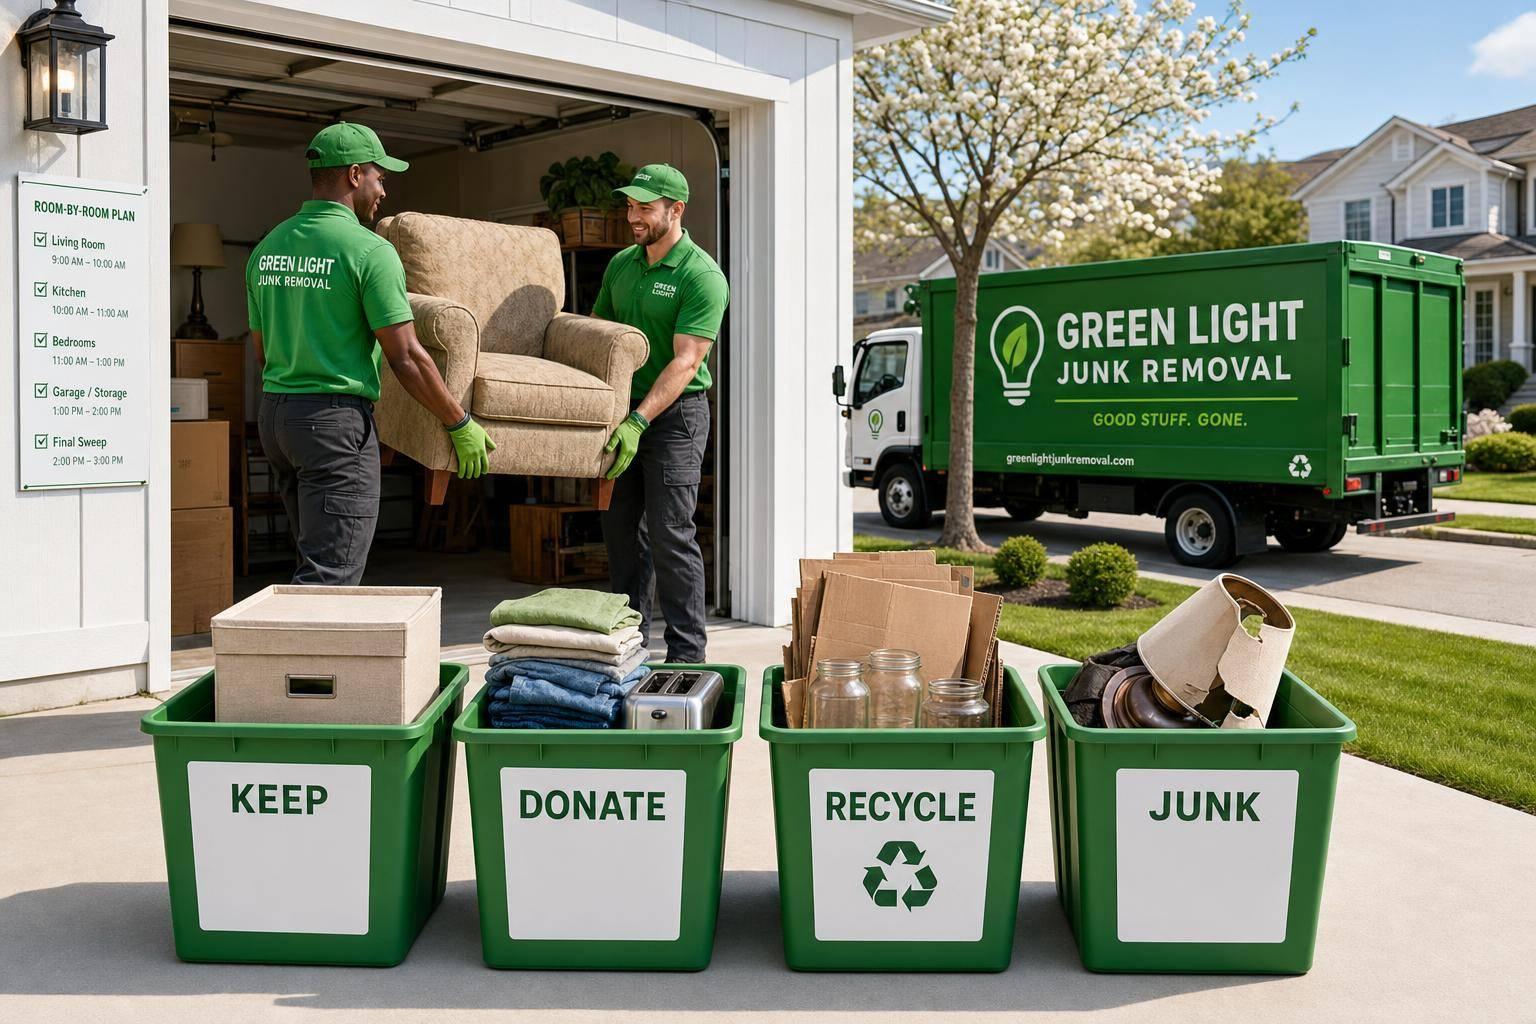
The easiest way to declutter your home is to use one simple system in every room: keep, donate, recycle, and junk. If I start with a room-by-room plan, set a timer, and remove bulky items early, the whole job feels less stressful and far less likely to drag on.
Here’s the short version:
- I gather bags, boxes, bins, labels, and a marker before I start.
- I make a full-home list, then handle the spaces that get in my way most.
- I use plain rules like the 90/90 Rule, 12-month rule, and a Maybe Box to make decisions faster.
- I clear high-traffic rooms first, then move to the kitchen, bedrooms, bathrooms, and storage spaces.
- I donate usable items, recycle what I can, and trash only what can’t be reused.
- I set aside large furniture, mattresses, appliances, and electronics for the right pickup or drop-off.
- I finish by booking donation drop-off or junk removal services within 24 to 48 hours so piles don’t creep back in.
A few numbers stand out: about 20% of pantry food may be past its prime, and junk crews often divert about 60% of what they collect away from landfills through donation and recycling. Also, DIY dump runs can cost about $30 to $100 per trip, which adds up fast when I’m dealing with heavy or bulky items.
If I want a clean home without getting stuck, the path is simple: plan first, sort fast, remove big items safely, and follow through right away.
21 Things People Forget to Declutter When Spring Cleaning
sbb-itb-096ce5b
What You’ll Need Before You Start
Get your supplies together before you begin. When everything is within reach, you’re less likely to stop halfway through to look for a marker or more bags. And those little breaks can throw off your momentum fast.
Here’s what to pull out:
- Heavy-duty trash bags
- Sturdy cardboard boxes
- Clear storage bins
- A permanent marker
- Labels or painter’s tape
- A timer
Painter’s tape works well for labels, and a timer helps you stay focused instead of drifting from one task to another.
It also helps to have a written checklist broken down by room. That makes the cleanup feel more doable. “Clean the house” is a big, fuzzy goal. “Clear the hallway closet” is something you can knock out.
Label each box by destination so you can make decisions fast.
Set bulky items off to the side for later pickup or proper disposal.
With your supplies ready, start with a whole-home declutter plan.
1. Start with a Whole-Home Declutter Plan
Start with a walk-through of your home and a notebook in hand. Write down every cluttered area you see. That simple list gives you a clear map, so you don’t bounce from room to room and lose steam halfway through.
Then rank each space by how much it disrupts your day-to-day life. A packed closet you fight with every morning or a dining table buried under stuff should move to the top. Give each room a time limit too, like one focused session per area, so the job feels finite instead of endless.
As you sort, use four plain categories:
- Keep
- Donate
- Recycle
- Junk
For large items like sofas, mattresses, and furniture, don’t try to wrestle them out by yourself. Set those aside for professional pickup. With the plan mapped out, the next step gets a lot easier because each room has a clear path forward.
2. Use Simple Sorting Rules to Make Decisions Faster
Once your whole-home plan is set, make each room easier to sort with a few simple rules.
For most people, the slowest part of decluttering is deciding what stays. That back-and-forth can eat up a lot of time. A simple fix is to use the same four labels from your plan for every item. That way, you’re not making up a new system in each room. Start with a fast trash sweep first. It gives you an easy win and helps you build momentum before you get into the harder calls.
If you run into items you’re not sure about, try a Maybe Box. Put those uncertain things away and check them again in 3–6 months. If you haven’t used them in 3–6 months, donate or recycle them.
These quick rules make sorting less draining and help you keep moving:
| Rule | When to Use It |
|---|---|
| 20/20 Rule | Let it go if replacing it costs less than $20 and takes under 20 minutes. |
| 90/90 Rule | Let it go if you have not used it in 90 days and will not use it in the next 90. |
| 12-Month Rule | Donate anything unused for a full year. |
One more thing: don’t keep something only because it was expensive. That money is already spent. What matters now is whether the item still earns its place in your home.
Use these rules in every room so the cleanout keeps moving.
3. Declutter the Entryway, Living Room, and Common Areas
Start with the rooms that shape the feel of the whole house. These high-impact spaces give you quick wins and help you build momentum.
Before you clean, sort each area into Keep, Donate, Recycle, and Junk. Sort first, then clean. Go after the easy stuff right away: old mail, delivery boxes, wilted plants, expired magazines, and broken décor.
Work from top to bottom. Start with ceiling fans and high shelves, then move to furniture and floors. In the living room, check sofas and chairs, then vacuum between cushions to pull out hidden trash or things that belong in another room. If a couch or other large piece is worn out or hasn’t been used in over a year, move it to the junk pile. Large furniture like sofas and tables often needs bulky-item pickup or junk removal help [2].
For décor, books, and small furniture in shared spaces, use the one-year rule. If you haven’t used it in a year and it has no seasonal or sentimental value, let it go. Small furniture in good shape can often be sold, donated, or posted on local marketplaces or through thrift stores.
When you finish one zone, return anything that belongs elsewhere to its proper room right away. Don’t let it become a new pile in the hallway.
Once the common areas are clear, move into the kitchen, where small clutter tends to hide in plain sight.
4. Spring-Clean and Declutter the Kitchen
The kitchen can be one of the hardest rooms to declutter. A lot of the mess is out of sight, tucked into cabinets, drawers, and the pantry. And it adds up fast. Roughly 20% of pantry items in the average home are past their prime [2], so the pantry is a smart place to start. Pull everything out, check expiration dates, and throw expired food into the trash or compost.
Next, go through the appliances and gadgets you actually use. A simple way to make decisions is the 90/90 Rule: if you haven’t used it in the last 90 days and won’t use it in the next 90, it’s probably time to let it go. Working small appliances can go to local charities, thrift stores, or reuse centers. Broken appliances and metal items can be taken to a scrap yard or a city recycling drop-off. Cracked glassware and frayed cords are safety risks, so put those straight in the trash instead of the donate box.
After that, reset your counter space. Keep only the appliances you use every day on the counter, and limit the junk drawer to 10 must-have items. Everything else just eats up space.
If you’re dealing with heavy appliances, don’t try to move them on your own. Set up professional pickup instead. Professional haulers typically donate or recycle about 60% of the items they collect, keeping them out of landfills [2]. Broken fridges and stoves should be handled that way.
With the kitchen in better shape, the next stop is bedrooms and closets.
5. Make Bedrooms and Closets Lighter and More Organized
After the kitchen, bedrooms and closets are usually the next easy win. Start by taking everything out of the closet, off the shelves, and from under the bed before you sort even one item. That empty-it-all move lets you see the full picture of what you own. It also brings forgotten stuff back into the light, like old sunglasses or costume jewelry hiding in storage. [3]
Then sort everything into the same four piles. For clothes, use a simple test:
- Have you worn it in the last 12 months?
- Does it fit?
- Does it still match your style?
If the answer is no to two or more, let it go. [4] Use that same direct approach with bedding too.
Only donate clean, gently used clothing, linens, and towels. Torn or stained textiles should go to textile recycling programs instead. [4] Women’s shelters and animal rescues often ask for linens and towels, so those can be a good place to give usable extras. [5]
"A good rule of thumb – if you wouldn’t hand it to a friend, don’t hand it to a charity." [5]
For the items you keep, labeled bins can make life a lot easier, especially for seasonal bedding and travel gear. [3] Broken hangers, damaged luggage, bent closet rods, and warped bins belong in the junk pile. [4]
Next up: bathrooms and linen storage, where towels, toiletries, and backup supplies tend to stack up fast.
6. Tidy Bathrooms and Linen Storage Without Creating Waste
Bathrooms may be small, but they attract clutter fast. Expired medications, half-used bottles, duplicate items, and worn-out towels can pile up before you notice. Start by emptying the counters, medicine cabinet, and vanity drawers completely. Seeing everything at once makes it much easier to spot duplicates and decide what should go back [6][7].
Then sort what you have into a few simple groups:
- Junk
- Donate
- Recycle
Outdated or expired products should go straight to junk. Medications need extra care. Use DEA take-back days or year-round drop-off kiosks for medications. Never flush them unless they appear on the FDA flush list [8].
For toiletries and personal care items, donate unopened, unexpired products. Trash anything opened, expired, or empty. After that, group what’s left by type, like skincare, first aid, and hair care. Store those items in labeled bins or cubes, and keep linens neatly stacked so they’re easy to grab when you need them.
As part of your spring cleaning, wash bath mats and shower curtains too. It helps to wash one set at a time so you still have clean towels ready to use. When it’s time to clean the bathroom itself, skip paper towels and use microfiber cloths instead. They trap dust and leave mirrors streak-free without the extra trash [6][7].
Once the bathroom and linen area are under control, move on to garages and other storage spaces.
7. Turn Your Garage and Storage Spaces into Usable Areas
After you finish the smaller rooms, shift to the garage and other storage spots. That’s usually where clutter stacks up the fastest. A garage tends to become the place for everything that no longer fits anywhere else, so clearing it out can free up space across the whole house. Spring also makes this job easier, thanks to milder weather and longer daylight hours.
Start by pulling everything onto the driveway so you can see it all in one place. Then sort each item into four groups: Keep, Donate or sell, Recycle, and Junk. If you want to move faster, use the 12-month rule for seasonal gear and stored items. If you haven’t used it in the past year, it may be time to let it go.
Once you’ve cleared out the junk, use the walls to open up floor space. Pegboard works well for tools, slatwall helps with heavier gear, and hooks can get bikes up off the ground. Swap cardboard boxes for clear plastic bins, and label each bin on both the front and the top so it’s easier to find what you need later. Take old paint and gasoline to a hazardous-waste facility, and put aside heavy or bulky items for professional pickup.
8. Get Rid of Old Furniture, Couches, and Bulky Junk the Right Way
Once the garage is done, bulky furniture is often the last big mess left behind – old sofas, bed frames, dressers, and broken pieces that won’t fit in a regular trash bin. The good news? A lot of this stuff can be donated, recycled, or picked up for proper disposal. Start with the biggest items first. That one move alone makes the rest of the room much easier to sort.
If something is still in decent shape, try donation first. Many charities offer furniture pickup, but they’ll usually pass on pieces with stains, structural damage, or pet hair [10]. If you’re on the fence about keeping something, give it a clear 7-day deadline. If it hasn’t moved by then, donate or recycle it instead of letting it take over your space again [2].
For metal bed frames and grills, call local scrap yards. Many take them at no charge [9]. Mattresses are a separate story and need their own recycling route [2].
When a piece is broken, oversized, or just too heavy to handle safely, junk removal is often the best call. Items over 200 lbs can be risky to move without the right gear and extra help [9]. Professional junk removal can take old furniture, bulky couches, and other large pieces that are too heavy or unsafe to move on your own.
Once the big furniture is out of the way, it’s time to deal with appliances and electronics, since those need a different disposal route.
9. Dispose of Old Appliances and Electronics Responsibly
Appliances and electronics need special handling. Many contain hazardous materials or refrigerants, which means they can’t go out with regular trash. Refrigerants in items like AC systems and refrigerators must be recovered by a certified technician.
After you’ve cleared out the bulky furniture, put appliances and electronics in a separate pile. Then sort them by condition. If something still works, donate it. If it doesn’t qualify for donation, look into local utility takeback programs or retailer recycling drop-offs.
Charities may accept working electronics and large appliances in good condition. But if an item is broken or energy-inefficient, it’s better to skip the general donation route and send it to the right recycling channel instead.
Retail drop-off programs can help with:
- electronics
- batteries
- small appliances
Still, check local rules before tossing anything in the trash. A simple way to think about it is: test it, donate it, recycle it, or schedule pickup. And before you hand off laptops or smart TVs, erase personal data first [11].
If you’re dealing with broken appliances, oversized units, or a pile of e-waste that’s too much to move on your own, professional junk removal can take care of appliance pickup, recycling, donation sorting, and items that need careful handling [12].
Once the hazardous items are out of the way, switch to low-waste cleaning tools to finish the rest of the cleanout.
10. Choose Eco-Friendly Cleaning and Organizing Tools as You Go
Once you’ve sorted the bulky stuff, finish the job with tools that cut down on waste. Use washable cloths to wipe surfaces as you work. Set out labeled reusable bins so each category stays separate instead of turning into one big mess.
These small choices help the process stay efficient and make big cleanouts feel less overwhelming. They also come in handy if your spring cleanout starts to look more like a move or an estate cleanout.
11. Use Your Spring Cleanout as a Head Start for a Move or Estate Cleanout
A spring cleanout can do more than tidy up your home. It can also give you a head start on a move or an estate cleanout.
The same keep / donate / recycle / junk system helps speed things up because it cuts down on decisions before packing even begins.[1]
Start with the storage-heavy areas first, especially garages, basements, and attics. Those spaces tend to collect forgotten stuff fast, which makes them the first place to spot what should go.[1]
As you sort, flag bulky furniture, appliances, and other hard-to-move items early. That gives you time to schedule pickup before moving day instead of scrambling at the last minute.
Professional junk removal can help with heavy lifting, oversized items, and hard-to-reach spaces like attics and basements.[1] After the bulky items are sorted, the next call is simple: haul them yourself or set up a pickup.
12. Know When to Bring in Professional Junk Removal Help
Spring cleanouts have a way of snowballing. What starts with one closet can spill into the garage, basement, or attic before you know it. Once the mess stretches past a single room, you need to make a call: haul it yourself or bring in help.
It usually makes sense to get help when the stuff is too heavy to move safely, when you’d need more than one truckload, or when some items have special disposal rules. Old AC units and CRT TVs are good examples. They may need special handling because of refrigerants or lead. At that point, the job is no longer just about sorting things out. It’s about moving heavy, awkward, or regulated items without slowing everything down.
Professional junk removal can also save a lot of time when the load is large or spread across different parts of the house. Crews can carry bulky items out of attics, basements, and upper floors, which cuts out extra dump runs and equipment rentals. The next step is comparing DIY hauling with professional pickup.
DIY Hauling vs. Professional Junk Removal
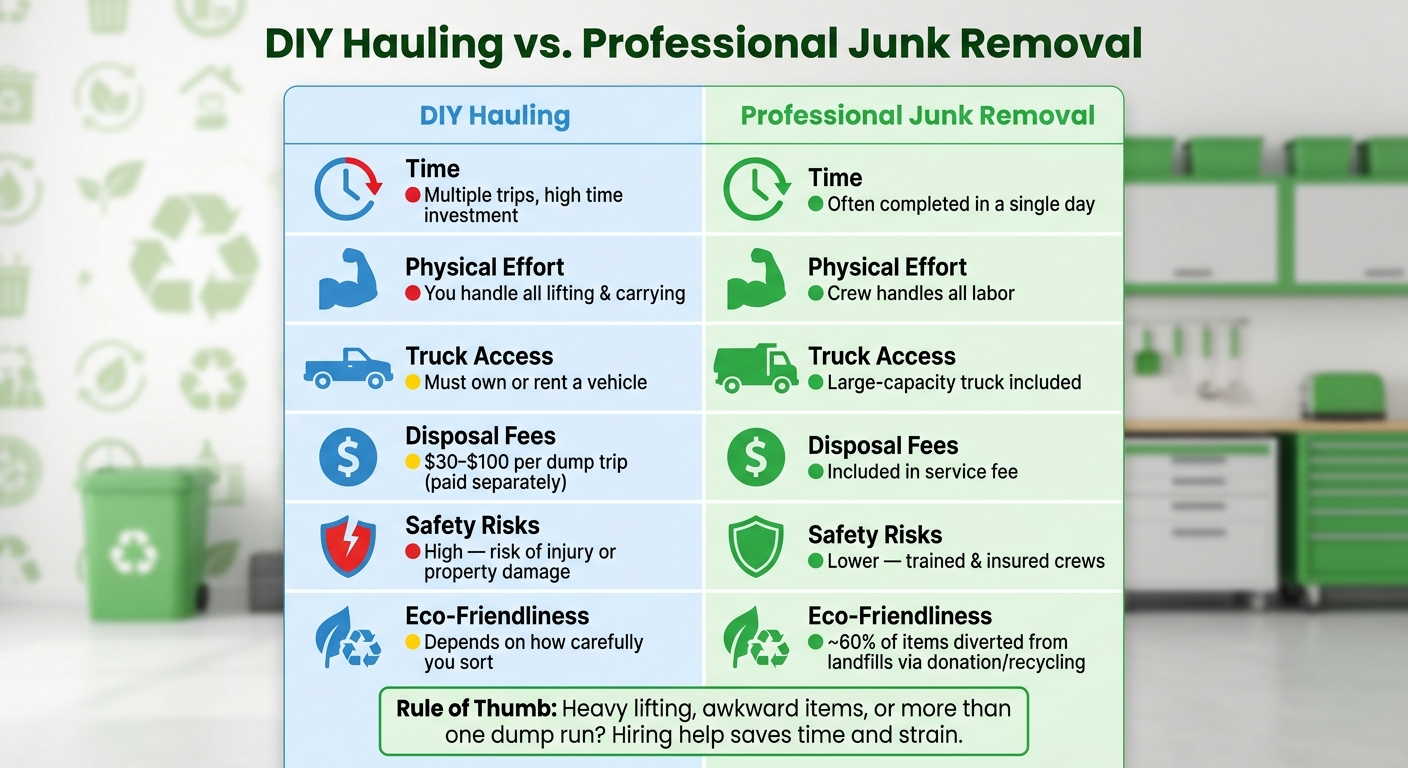
DIY Hauling vs. Professional Junk Removal: Cost, Effort & Eco-Impact
Once the job is too big for one person or one car, the choice gets pretty simple: haul it yourself or hire a crew. Both can work. It just depends on what you’re trying to move.
DIY makes the most sense for small loads you can finish in one trip. But it starts to fall apart when the job includes a sofa, refrigerator, packed garage, or a mix of junk from several rooms. A DIY dump run usually costs $30 to $100 per trip in truck rental and dump fees [13]. And that doesn’t include the strain of lifting, loading, and unloading everything on your own.
Professional junk removal wraps labor, truck use, and disposal into one service. That’s a better fit for bulky furniture, appliances, and full cleanouts. You don’t need to rent a truck, figure out equipment, or spend your day making repeat trips to the dump.
Here’s the side-by-side view:
| Factor | DIY Hauling | Professional Junk Removal |
|---|---|---|
| Time | High – requires multiple trips and heavy lifting | Low – often completed in a single day [2] |
| Physical Effort | High – you handle all lifting and carrying | Minimal – the crew handles all labor [2] |
| Truck Access | Must own or rent a vehicle | Large-capacity truck included |
| Disposal Fees | Paid separately at the dump | Included in the service fee [13] |
| Safety Risks | High – risk of injury or property damage | Lower – trained and insured crews [2] |
| Eco-Friendliness | Depends on how carefully you sort and haul items | High – usable items are often diverted from landfills [2] |
A good rule of thumb: if the job means heavy lifting, awkward items, or more than one dump run, hiring help usually saves time and wear on your body. If it’s a light load and you already have a truck, DIY can still be the cheaper path.
Use the option that clears the space safely and with the least extra handling. Use landfill only for items that can’t be reused or recycled.
Conclusion
When you handle one room at a time, the whole job feels a lot less overwhelming. Spring decluttering doesn’t need to eat up your entire day. Split it into small, visible tasks, and it’s much easier to keep going and actually finish.
Use the same sort-and-follow-through system in every room. Then set up a donation drop-off or junk pickup within 24 to 48 hours after sorting, so those piles don’t drift right back into the house.
If that last step feels too big to do on your own, get help with the heavy lifting. For bulky items you can’t move safely, Green Light Junk Removal can take care of pickup and responsible disposal, including donating or recycling items whenever possible. That means less stress for you and a home that feels lighter and simpler to keep up.
The goal is a lighter home that’s easier to clean, move through, and enjoy.
FAQs
How long should spring decluttering take?
Spring decluttering can take a few hours or a few days. It mostly depends on two things: the size of your home and how much stuff has piled up.
The easiest way to make it feel less like a marathon is to go room by room. That gives you a clear plan and keeps the job from turning into one big mess.
A lot of people block off a few set hours, a full weekend, or a couple of dedicated days so they can finish at a comfortable pace.
What should I do with sentimental items?
Keep the items that mean the most, like a few special keepsakes. A simple rule helps: pick one or two items for each category or person, then store them in one set place, such as a shelf or small cabinet. That keeps the memories without letting clutter take over.
If something is bulky or you have too many pieces to store, take photos or digitize them so you still have the memory. You can also turn meaningful items into something useful, which gives them a second life without taking up extra space.
When should I hire junk removal help?
Consider hiring junk removal help when you’re dealing with heavy or bulky items, or when time, mobility, or energy is in short supply.
It can make a big difference for:
- Furniture
- Appliances
- Whole-house decluttering
- Moves
- Estate cleanouts
- Years of built-up clutter
Professional help can save time, reduce strain, and take a lot of stress off your plate. It can also help with eco-friendly disposal, which matters when you want items handled with more care than a simple curbside dump.