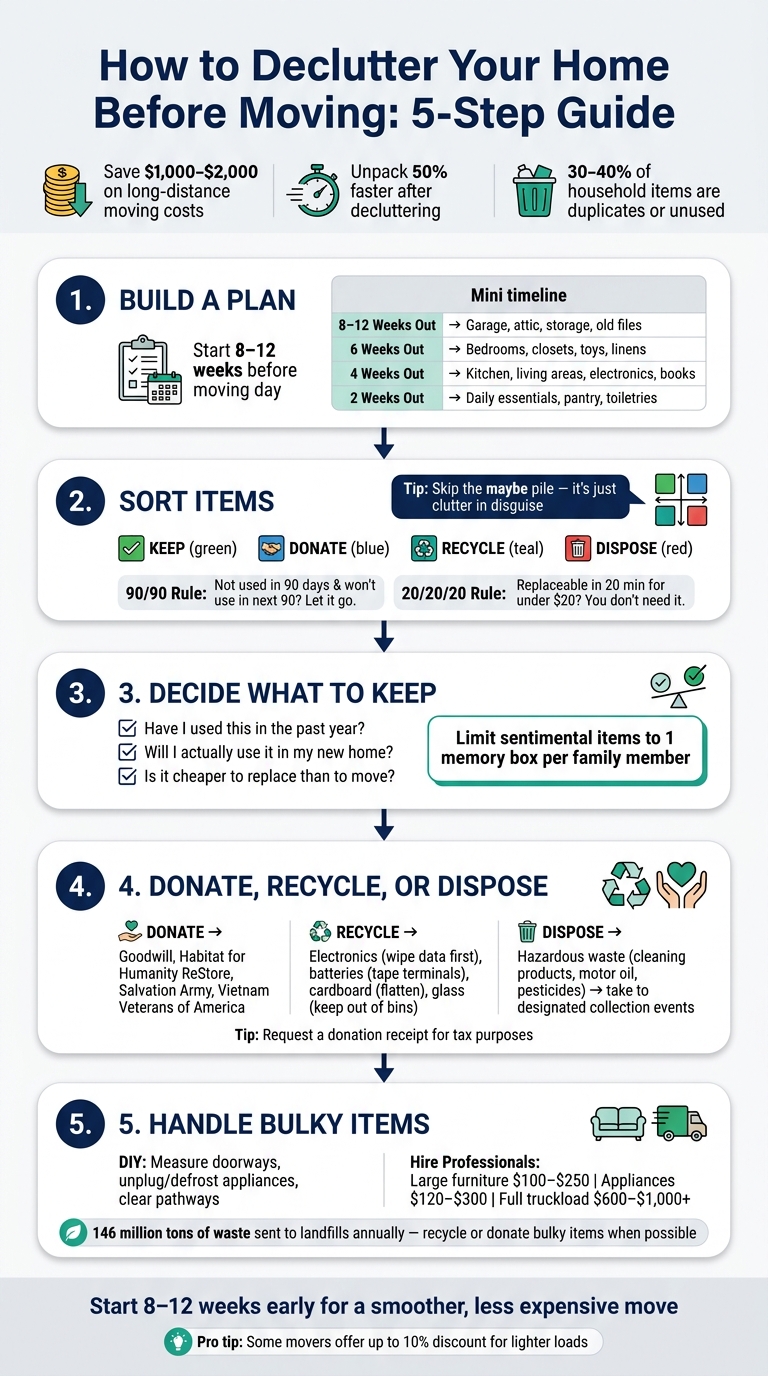
Moving can be stressful, but decluttering beforehand can save you money, time, and effort. Here’s why it matters and how to do it:
- Save Money: Movers charge by weight. Reducing 2,000 pounds of items could save $1,000–$2,000 on a long-distance move.
- Save Time: Decluttered households unpack 50% faster.
- Eliminate Unused Items: 30%–40% of household items are often duplicates or expired.
Steps to Declutter:
- Create a Plan: Start 8–12 weeks before moving. Focus on one room or category at a time.
- Sort Items: Use four zones – Keep, Donate, Recycle, Dispose. Avoid "maybe" piles.
- Decide What to Keep: Ask if you’ve used it in the past year or if it’s cheaper to replace than move.
- Handle Leftovers Responsibly: Donate gently used items, recycle electronics, and properly dispose of hazardous materials with professional junk removal services.
Starting early and staying organized ensures a smoother, less expensive move. Don’t wait – start today!
How to Declutter Your Home Before Moving: 5-Step Guide
Decluttering for a Move? Watch This First
sbb-itb-096ce5b
Step 1: Build a Decluttering Plan
Jumping into decluttering without a solid plan can lead to frustration and burnout. To stay on track, define your goals, set a timeline, and gather all the supplies you’ll need before you begin.
"The first rule of decluttering before moving is knowing your ‘why’ and maintaining a positive mindset." – PODS [1]
Set a Timeline and Prioritize Rooms
Starting early is key to reducing stress. Ideally, you should begin 8 to 12 weeks before your moving day. Here’s a breakdown of how to pace yourself:
| Timeline | Target Areas | Focus Items |
|---|---|---|
| 8–12 Weeks Out | Storage & Paperwork | Garage, attic, shed, old files, seasonal decor |
| 6 Weeks Out | Bedrooms & Closets | Clothing, linens, guest room items, toys |
| 4 Weeks Out | Living Areas & Kitchen | Cookware, books, electronics, decor, media |
| 2 Weeks Out | Daily Essentials | Toiletries, pantry items, everyday dishes |
Start with low-traffic areas like the garage, attic, or basement. These spaces often hold the most clutter, and tackling them first gives you momentum for harder decisions later on.
"If you start with rooms that are less used, you have the time to go through all of those things – and you’ll likely get rid of one-half to three-fourths of it." – Maija Diethelm, Professional Organizer [1]
Dedicate 1–3 hours each week to decluttering. If you’re working on a tighter schedule, aim for 3–6 hours weekly. Once you decide to keep an item, pack it right away to avoid re-sorting.
Gather Your Decluttering Supplies
Having the right supplies on hand can save you from constant interruptions. Here’s what you’ll need:
- Sturdy moving boxes
- Heavy-duty trash bags
- Packing tape
- Permanent markers for labeling
For specific items, consider using wardrobe boxes for clothing and dish boxes for fragile kitchenware [2]. To save money and reduce waste, repurpose suitcases, baskets, or storage bins as sorting containers [2].
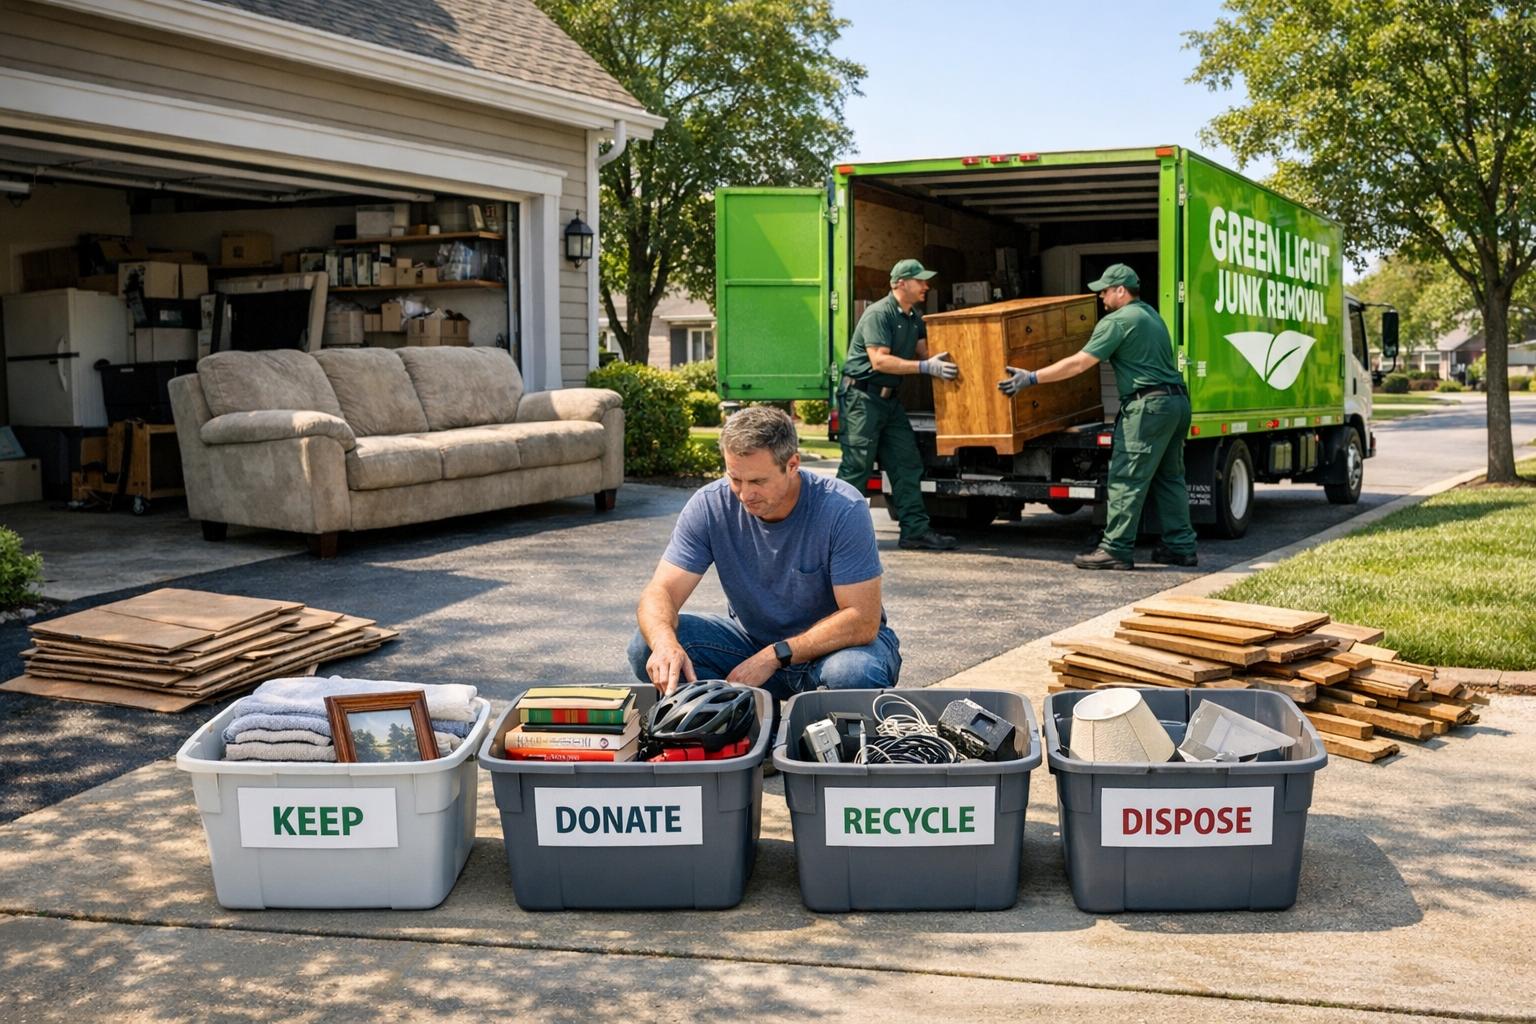
Set up four clearly labeled zones: Keep, Donate, Recycle, and Dispose. This simple system speeds up decision-making and prevents confusion during the sorting process.
With your timeline set and supplies ready, you’re prepared to move on to sorting items by category in the next step.
Step 2: Sort Items by Category and Room
Now that you’ve got your timeline and supplies ready, it’s time to start sorting. The secret? Focus on one room or one category at a time – never both. Trying to tackle your entire house in one go is a fast track to exhaustion.
"We always have way more stuff than we even imagine." – Maija Diethelm, Professional Organizer [1]
Use the Keep, Donate, Recycle, Dispose Method
Your designated zones are your go-to tool for decision-making. Every item should immediately go into one of the four zones: Keep, Donate, Recycle, or Dispose. Skip the "maybe" pile – it’s just clutter in disguise.
For sensitive documents like old bank statements or bills, add a Shred category. Shred these to protect your personal information, and recycle non-sensitive paper to keep things simple.
Not sure about an item? Try these guidelines:
- 90/90 Rule: If you haven’t used it in the last 90 days and won’t use it in the next 90, it’s time to let it go.
- 20/20/20 Rule: If replacing it would take less than 20 minutes and cost under $20, you don’t need to keep it.
Once you’ve sorted items into zones, take it a step further by organizing within each category for more clarity.
Sort by Specific Categories
After dividing items into zones, focus on grouping them by category. Sorting by category – rather than by room – helps you spot duplicates and make decisions more efficiently.
| Category | Quick Action |
|---|---|
| Clothing & Shoes | Donate anything you haven’t worn in a year or that doesn’t fit anymore. |
| Kitchenware | Toss food containers without lids and expired pantry items. |
| Books & Media | Keep only what you’d honestly read or watch again. |
| Electronics | Get rid of random cords, dead batteries, or devices you haven’t used in a year. |
| Furniture & Decor | Compare each piece to your new home’s layout before deciding what stays. |
Sorting this way not only simplifies your move but also ensures unwanted items are disposed of responsibly.
For clothing, try the Hanger Method. Turn all your hangers backward in the closet. Over the next few weeks, only turn a hanger forward when you wear the item. By moving day, anything still hanging backward is a clear candidate for donation.
When it comes to furniture, make decisions early. Large items require planning, whether that’s scheduling a donation pickup, listing them for sale, or arranging for junk removal. Waiting until the last minute adds stress and limits your options.
Step 3: Decide What to Keep
Now that your belongings are sorted into zones, it’s time to figure out what stays and what goes. The goal? Minimize the volume of your shipment to save on costs. To do this effectively, evaluate each item with a few pointed questions.
Ask the Right Questions
Long-distance moving costs are based on shipment volume, not time, so every extra item adds to your bill. To make smart decisions, ask yourself these three questions for each item [4]:
- Have I used this in the past year?
- Will I actually use it in my new home?
- Is it cheaper to replace than to move?
"If you have not used, worn, or needed an item in the past 12 months, it should be donated, sold, or discarded." – Safebound Moving & Storage [4]
For example, take a sectional sofa that eats up 50–70 cubic feet of space. If selling it would bring in $200, but moving it costs more, it might be better to part ways. Another helpful question: “Would I buy this again today if I didn’t already own it?” [3]
Avoid Overpacking Sentimental Items
Sentimental items can be tricky, but a little restraint goes a long way. Try limiting these to one memory box per family member. If it fits in the box, it can come along. If not, consider photographing or digitizing it instead. This keeps the memory alive without adding unnecessary bulk.
For collections like event T-shirts, keep only the top five that mean the most to you. Take photos of the rest to preserve the memories without the clutter [4].
If you have kids, involve them by letting them pick 10 to 15 favorite toys to bring. This keeps them engaged while avoiding an overload of items [3].
"The less you have to move, the more time, money, and energy you’ll save." – TWO MEN AND A TRUCK [3]
Lastly, irreplaceable items like family photos, heirloom jewelry, and important legal documents should stay with you – not on the moving truck. Keep these essentials close at hand during the move [3].
Step 4: Donate, Recycle, or Dispose of Items Responsibly
Once you’ve decided which items to leave behind, the next step is to handle them responsibly. Instead of simply throwing everything away, consider options like donating, recycling, or using proper disposal methods.
Donate to Local Charities or Shelters
If you have items that are clean, functional, and gently used, they could be perfect for donation. Common donations include furniture, appliances, clothing, kitchen items, electronics, and other household goods. Here are some organizations to consider:
| Organization | Commonly Accepted Items | Beneficiaries |
|---|---|---|
| Goodwill | Clothing, furniture, electronics, household items | Job training and employment services |
| Habitat for Humanity ReStore | Building materials, furniture, appliances, home goods | Affordable housing construction |
| Salvation Army | Furniture, clothing, appliances, household goods | Rehabilitation and community programs |
| Vietnam Veterans of America | Clothing, small household items, furniture | Veterans and their families |
| Dress for Success | Professional women’s clothing and accessories | Helping women secure employment |
For larger items like furniture, many organizations offer pickup services. Be sure to schedule pickups a few days in advance and request a donation receipt for tax purposes. However, avoid donating hazardous materials like paint, chemicals, or pesticides, as these require specialized disposal.
Recycle Items the Right Way
Recycling is another great way to manage items you no longer need. To ensure items are properly recycled, follow these tips:
- Remove any food residue from containers.
- Flatten cardboard boxes.
- Detach bottle caps before recycling.
- Keep broken glass out of recycling bins to protect workers.
Some materials need special recycling methods. Electronics, batteries, plastic bags, and Styrofoam often fall into this category. Before recycling electronics, make sure to wipe all personal data. For batteries, tape the terminals before taking them to a hazardous waste center. Tools like Earth911 can help you find drop-off locations for items that require special handling.
Dispose of Non-Recyclable Items
For items that can’t be donated or recycled, proper disposal is key. Hazardous waste – such as cleaning products, motor oil, varnishes, and pesticides – should be taken to designated collection events or local drop-off programs. Never throw these items in regular trash or pour them down the drain.
Certain items, like refrigerators or air conditioning units, contain Freon and require certified professionals to handle them before recycling. Similarly, old mattresses can often be recycled, with up to 90% of their materials being repurposed through mattress recycling programs [6].
If you’re overwhelmed by the volume of non-recyclable or hazardous items, consider hiring a professional junk removal service like Green Light Junk Removal. They can help sort, haul, and ensure items are directed to the proper facilities, making the process much easier as you prepare for your move.
Step 5: Deal with Bulky or Hard-to-Move Items
Once you’ve taken care of smaller items, it’s time to tackle those larger, more challenging pieces. Think sofas, refrigerators, treadmills, or bed frames – these are heavy, awkward, and often require special handling. Knowing your options can make the process far less stressful.
When to Call a Professional Junk Removal Service
Some items are simply too difficult or risky to manage on your own. Imagine trying to move a sectional sofa from a third-floor apartment, a piano, a hot tub, or an entire home gym. Attempting this without help could lead to injuries or damage to your property. This is where a professional junk removal service comes in handy. These teams can handle bulky items from any part of your home – whether it’s the basement, attic, or upper floors – and can even disassemble complex pieces on-site [7].
To ensure everything goes smoothly, there are a few prep steps you can take:
- Unplug and defrost appliances ahead of time.
- Measure doorways to confirm large items can fit through.
- Clear pathways by removing rugs and other obstacles.
For especially heavy items like pianos or pool tables, notify the service provider in advance so they can bring the necessary equipment [5].
"Say goodbye to the hassle of unwanted items and let us handle the heavy lifting for you. Whether it’s old furniture, appliances, electronics, or construction debris, we’re here to clear it all away efficiently and responsibly." – Green Light Junk Removal [5]
Costs for this service depend on the size and number of items. For instance, large furniture might run $100–$250, appliances $120–$300, and a full truckload could range from $600 to over $1,000. Volume-based pricing often provides the best value [7].
Next up: how to responsibly dispose of these large items in an eco-friendly way.
Eco-Friendly Disposal Options for Large Items
Disposing of bulky items sustainably is an important step. Every year, Americans send about 146 million tons of waste to landfills. But many of these items have recyclable materials. For example, a discarded refrigerator can yield $15–$35 in scrap value from steel, copper, and aluminum, while washing machines typically offer $12–$25 in scrap metal [8]. Unfortunately, fewer than 19% of the 18.2 million mattresses discarded annually in the U.S. are recycled [8].
If you’re dealing with electronics, stores like Best Buy offer free drop-off recycling for items such as TVs (up to 32 inches), monitors, and printers [8].
Eco-conscious junk removal services, such as Green Light Junk Removal, take things a step further. They sort through collected items, ensuring usable pieces are donated to local charities and recyclable materials are sent to the proper facilities, reducing landfill contributions.
"Our eco-friendly junk removal practices ensure that as much waste as possible is recycled or donated, reducing the impact on landfills and promoting responsible disposal." – Green Light Junk Removal [5]
Conclusion: Start Your Move with Less Clutter
Moving can be stressful – don’t make it harder by hauling along items you no longer need. A clear plan can make all the difference. Start by sorting room by room, using the Keep/Donate/Recycle/Dispose method to decide what stays and what goes. Thoughtful decisions about your belongings, especially bulky items, can make your move smoother, less expensive, and far less overwhelming.
Every item you let go of saves money. As the saying goes, "the more stuff you have, the more it costs to move it." [1] Some moving companies even offer discounts – up to 10% – for lighter, decluttered loads [9].
For those larger, more cumbersome items, professional help is just a call away. Green Light Junk Removal specializes in handling heavy or awkward belongings, from old furniture to outdated appliances. They also focus on eco-friendly disposal, making it easier to stick to your decluttering goals.
Start early – ideally four to six weeks before moving day – to avoid last-minute chaos. As Maija Diethelm, Professional Organizer, advises: "Decluttering before moving ensures you’re only bringing the things you love and need to your new place." [1] Take the first step today and enjoy a move that’s lighter, easier, and far less stressful.
FAQs
What should I declutter first?
Start decluttering with areas you use daily, like the living room or bedroom. These spaces are often less daunting, making it easier to get started and gain confidence. Focus on sorting items into four categories: keep, donate, recycle, or dispose of. This simple system helps establish order and sets the stage for tackling other areas in your home.
How do I decide if it’s worth moving an item?
When deciding whether to move an item, think about its condition, value, timing, and effort. If the item is in good shape but no longer needed, donating it could be a great option. For items with monetary value, selling might make sense – provided you have the time to handle the process. On the other hand, damaged, unsafe, or oversized items may be better off discarded, especially if you’re working on a tight schedule. Aim for quick, practical choices that simplify your move, keeping donation, resale, or disposal in mind based on what works best for each item.
Where do I take hazardous items and old electronics?
Proper disposal of hazardous items – like batteries, paint, oil, and old electronics – requires careful attention to regulations. Companies like Green Light Junk Removal collaborate with local facilities to ensure these materials are handled correctly. Be sure to ask your junk hauler about any items that need special disposal to avoid potential fines. If you’re dealing with bulky or hazardous waste, renting a dumpster might be a good option. Just make sure to review your local guidelines to follow the proper procedures.