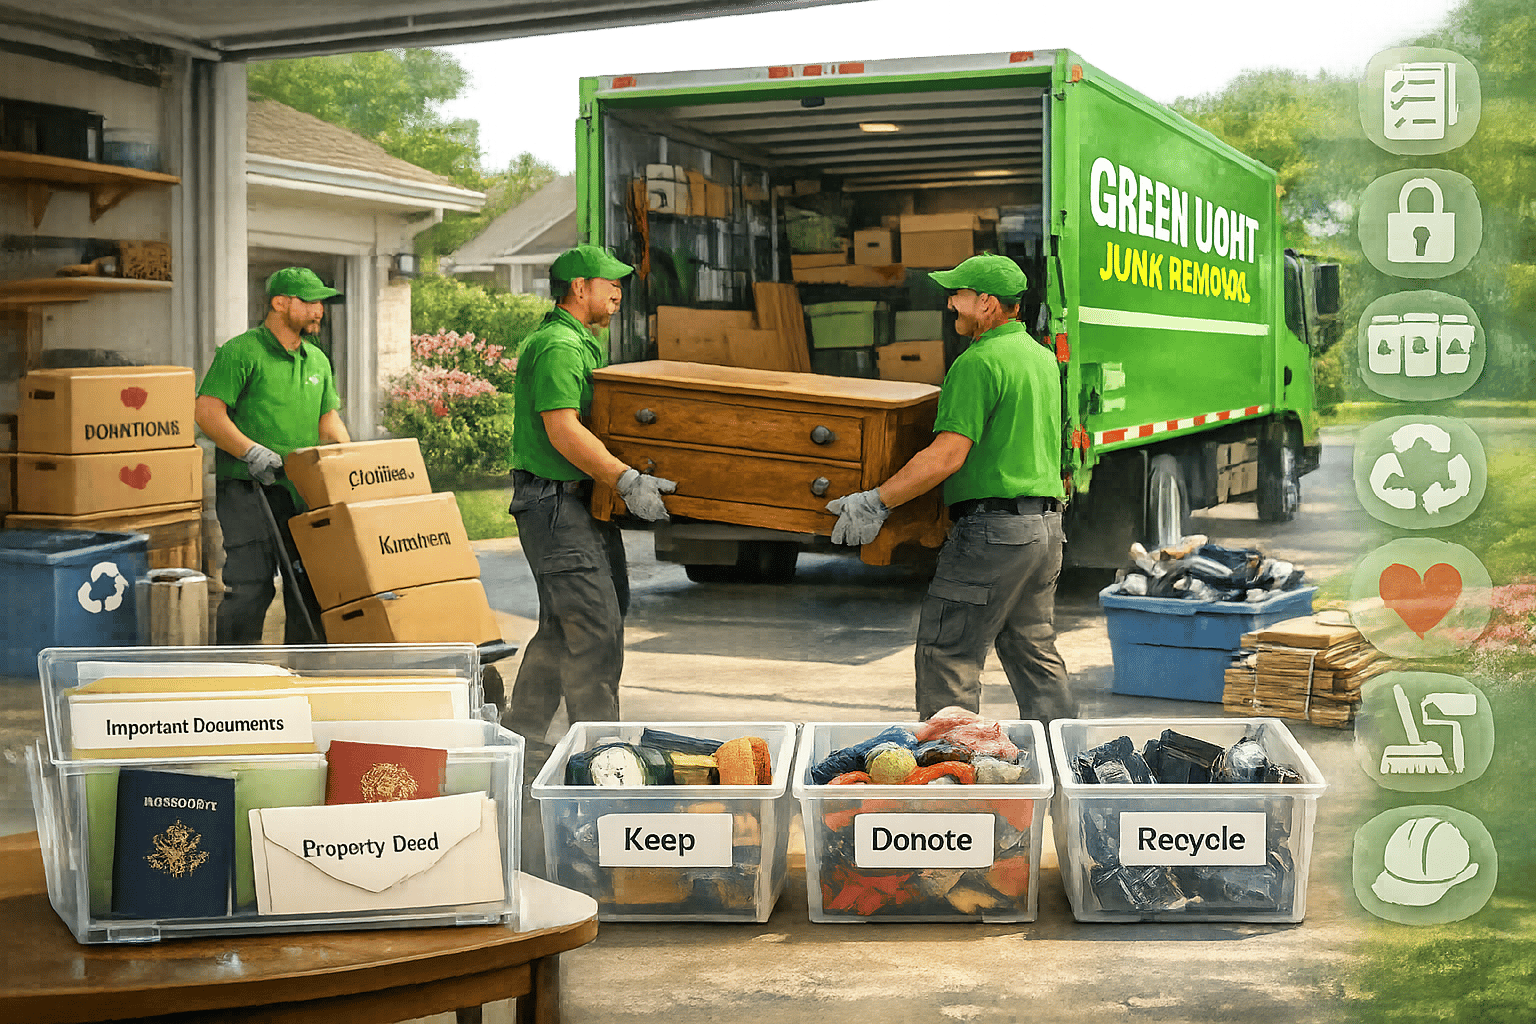
Dealing with an estate cleanout can feel overwhelming, but breaking it into steps makes it manageable. Here’s a quick roadmap to help you get started:
- Plan and Set Goals: Define your purpose (e.g., selling the property, meeting probate requirements) and create a realistic timeline. A 2,500 sq. ft. home typically requires 150–200 hours to clear.
- Secure Important Documents: Locate wills, deeds, financial records, and IDs. Store them safely and create digital backups.
- Organize Belongings: Sort items into categories: Keep, Sell, Donate, Recycle, Trash. Start with low-emotion areas like garages or basements to build momentum.
- Dispose Responsibly: Donate usable items, recycle electronics, and properly handle hazardous materials like paint or chemicals.
- Hire Professionals If Needed: For tight deadlines or large volumes, professional junk removal services can save time and effort.
- Prepare the Property: After clearing, deep clean and address minor repairs to get the home ready for sale or new occupants.
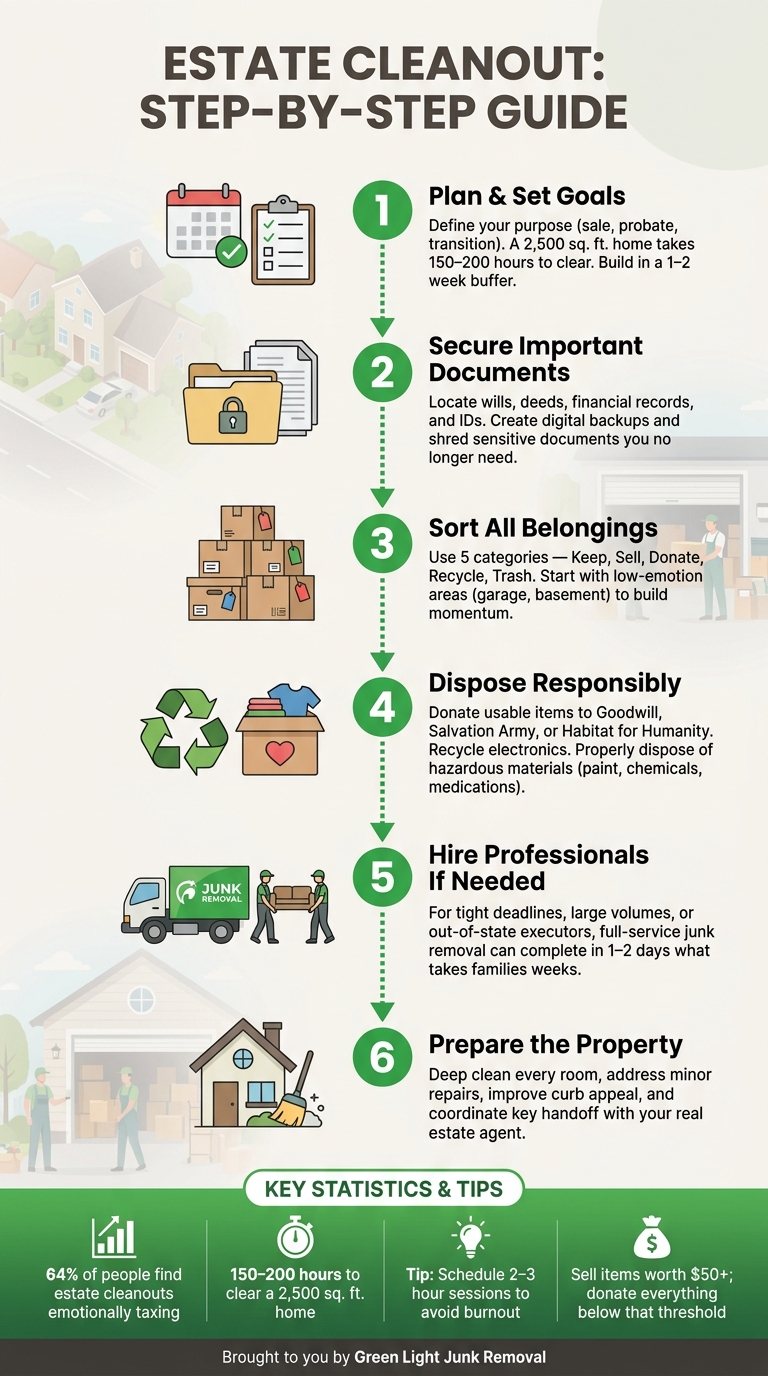
Estate Cleanout Step-by-Step Guide
How to Organize an Estate Cleanout, Removing Items from House After Death
sbb-itb-096ce5b
Planning the Estate Cleanout
Getting organized before diving into an estate cleanout can save you from unnecessary stress and costly mistakes. Start with a thorough walkthrough of the property – including the attic, basement, garage, and any outbuildings – to identify challenges like mold, unstable flooring, or hazardous materials that may require special handling.
Set Your Goals and Timeline
Begin by clarifying why you’re doing the cleanout. Are you preparing the home for a quick sale? Meeting probate requirements? Helping a loved one transition to assisted living? Your purpose will shape your priorities, pace, and overall approach.
Once you’ve defined your goal, set a realistic timeline. For reference, clearing out a 2,500-square-foot home typically requires 150–200 man-hours[9]. It’s unlikely you’ll finish in a single weekend, so build in a 1–2 week buffer for unexpected delays. If you’re working against a hard deadline, like a real estate closing or probate court date, plan milestones by working backward from that date.
"The goal isn’t perfection, it’s completion in a way that honors both the past and your own wellbeing." – Frontier Waste [3]
To avoid burnout, schedule 2–3 hour sessions rather than long, exhausting days. This approach not only reduces physical strain but also helps manage the emotional toll, which 64% of people report feeling during estate cleanouts[9].
Locate and Protect Important Documents
Before sorting or discarding anything, prioritize finding and securing critical documents. Losing a deed, will, or other vital paperwork in the chaos of a cleanout can lead to serious legal or financial trouble.
Focus on these four categories:
| Document Category | Specific Items to Locate |
|---|---|
| Legal & Estate | Wills, trusts, Letters Testamentary, death certificates |
| Property | Deeds, titles, mortgage records, insurance policies |
| Financial | Bank statements, stock certificates, retirement accounts, tax filings (3–7 years) |
| Identification | Passports, Social Security cards, birth certificates |
Search beyond obvious spots like the home office. Important documents often turn up in unexpected places – inside old books, at the back of freezers, or even under mattresses[5]. Once located, store these papers in a clearly labeled accordion folder or a locked container, and create digital backups for added security. For any sensitive documents you no longer need, shred them to minimize the risk of identity theft[1][10][11].
Get Family Members and Decision-Makers on the Same Page
Family disagreements can derail an estate cleanout faster than anything else. To avoid conflict, involve family members early and establish a clear process. One effective strategy is to separate the decision-making phase from the physical removal phase. For example, have family members use color-coded stickers to mark items they want before bringing in professionals to handle removal[3].
For high-value or sentimental items that multiple people want, consider using a rotation or point system to keep things fair[6]. If emotions are running high, a neutral third party – like a mediator or estate sale professional – can help ease tensions and take decision-making pressure off the family[3].
"Grief affects decision-making, so plan for breaks when emotions feel overwhelming." – TWO MEN AND A JUNK TRUCK [6]
Finally, a key legal reminder: don’t remove or sell any items until the executor has received "Letters Testamentary" or "Letters of Administration" from the court[1].
With clear goals, protected documents, and family alignment, you’ll be well-prepared to tackle the next stage: sorting and organizing. Thoughtful planning now will make the rest of the process much smoother.
Organizing and Sorting Items
Once you’ve set clear goals and aligned with your family during the planning stage, it’s time to tackle the actual sorting process. A solid sorting system is the key to managing what might otherwise feel overwhelming. Having a structured approach not only keeps you on track but also makes it easier to handle the emotional and logistical challenges of deciding what stays and what goes.
Create Clear Sorting Categories
To stay organized, use five main categories: Keep, Sell, Donate, Recycle, and Trash. Assign a labeled bin or color-coded sticker to each category, and stick to this system as you work through each room. Sorting one room at a time helps avoid confusion and gives you a clear sense of progress.
| Category | What Belongs Here | Where It Goes |
|---|---|---|
| Keep | Heirlooms, photos, legal documents, jewelry | Store in a safe location or a designated "Keep" area |
| Sell | Antiques, tools, high-end furniture, collectibles | Use estate sales, online platforms, or consignment shops |
| Donate | Usable clothing, kitchenware, books, linens | Local charities like Goodwill, Salvation Army, or Habitat for Humanity ReStore |
| Recycle | Electronics, scrap metal, old appliances | Take to e-waste drop-offs or recycling centers |
| Trash | Broken furniture, stained mattresses, expired goods | Use a roll-off dumpster or hire a junk removal service |
When deciding what to sell, focus on items worth $50 or more. Anything below that threshold is often better donated, saving you time and effort[6].
Start with Low-Emotion Areas First
Don’t dive into the most sentimental spaces right away. Begin with areas like the garage, basement, or spare guest room, which usually hold fewer emotionally charged items. These spaces allow for quicker decisions and help you build momentum. Starting with less challenging areas also helps conserve your mental energy for the tougher rooms later on. This is especially important, as 64% of people report that estate cleanouts are emotionally taxing[9].
Once you’ve cleared these low-emotion spaces, focus on making immediate decisions about keeping or parting with items. This strategy helps prevent decision fatigue, which can slow you down as you move through the process[12].
Decide What to Keep, Sell, or Donate
The hardest part of this stage is making decisions. To simplify, ask yourself two key questions: Does this item hold real financial or sentimental value? and Could someone else genuinely use this?
For items like jewelry or fine art, where the value might be unclear, consider getting a professional appraisal before making a decision[6][14]. As Emily Kyle, author of Good Grief Relief, explains:
"Cleaning out the house is actually 5–6 different jobs, and there are people who specialize in each one. Sorting is not selling. Selling is not hauling." [14]
If you’re struggling to let go of sentimental items, consider taking photos of them. A picture can preserve the memory while saving physical space[4][13].
Once your sorting is complete, you’re ready to move on to eco-friendly disposal and donation methods.
Eco-Friendly Disposal and Donations
After you’ve sorted through everything, the next step is to dispose of items responsibly. This approach not only cuts down on landfill waste but also helps your community and might even offer tax benefits if you donate to qualified nonprofits.
Donate Usable Items First
Items like clothing, furniture, books, kitchenware, and small appliances in good condition are perfect for donation. Organizations such as Goodwill, The Salvation Army, and Habitat for Humanity ReStore often accept these and may even provide free pickup for larger loads. Before donating, check with each organization to confirm what they accept, as restrictions can vary – especially for older electronics or appliances. Always ask for a written receipt for your donation, as contributions to qualified nonprofits can be tax-deductible based on their fair market value [15].
Don’t forget to inspect items like coat pockets, picture frames, or old books before donating. You never know what hidden cash or valuables might be tucked away [15].
For items that aren’t suitable for donation, recycling or proper disposal is the next step.
Recycle and Dispose of Hazardous Materials Properly
Hazardous materials like old paint, chemicals, batteries, and medications require special handling. Set these items aside early and look into your local municipal hazardous waste program. Many areas offer scheduled drop-off days or have permanent collection sites for safe disposal.
Electronics such as computers, TVs, and printers should go to certified e-waste recycling programs. Retailers like Best Buy often accept old devices for in-store recycling.
If your home was built before 1980, it’s wise to consult a licensed remediation specialist for asbestos or lead paint concerns [3].
| Material Type | Recommended Disposal Method |
|---|---|
| Paint & chemicals | Municipal hazardous waste drop-off |
| Medications | Pharmacy take-back programs or DEA collection sites |
| Electronics | Certified e-waste recyclers or retailer drop-offs |
| Asbestos & lead paint | Licensed professional remediation only |
| Batteries | Retailer recycling programs (e.g., Home Depot, Lowe’s) |
For items that don’t fit into donation or recycling categories, you’ll need to consider bulk disposal options.
Dispose of Bulky Items Responsibly
Large items like hot tubs, mattresses, couches, and old appliances are often the toughest to deal with during an estate cleanout. Many curbside trash services won’t accept them.
Start by checking if your municipality offers bulk item pickup services or if a local charity can arrange collection for items still in decent condition. These services are often free. For broken, stained, or extremely heavy items, hiring a professional junk removal service is usually the most practical solution.
When to Hire a Professional Junk Removal Service
Bringing in professionals can make an estate cleanout much easier and faster.
Signs You Need Professional Help
Once you’ve sorted and planned, it’s worth knowing when professional support is the best choice to ensure the cleanout is done quickly and safely.
Professional junk removal becomes essential when a property contains decades’ worth of belongings scattered across multiple areas like attics, basements, and garages. It’s even more critical when heavy or bulky items are involved – think pianos, safes, or hot tubs. The sheer volume of items can make a DIY approach nearly impossible.
Tight deadlines are another big reason to hire a service. If a realtor or attorney has set a firm deadline for clearing the property, there’s no time for a slow, piecemeal approach. The National Association of REALTORS® highlights this point:
"Estate cleanouts can be physically demanding and emotionally draining. Professional help can be a strong option when: A listing timeline is tight; The volume is substantial…; Heirs are out of state; The situation requires speed, discretion, or specialized hauling." [7]
For executors or family members who live far away, professional services can even handle the entire process remotely, saving time and stress.
This need for speed and care leads directly to the benefits of hiring full-service professionals.
What Full-Service Junk Removal Includes
Full-service junk removal typically starts with a walkthrough to understand the scope of work, including the volume of items, access points, and any specialty pieces. From there, the team handles everything – lifting, loading, and hauling – while ensuring floors, walls, and other surfaces stay protected.
Disposal is handled responsibly. Items that can still be used are donated to local charities, metals and electronics are sent to recycling facilities, and bulky items like mattresses or water heaters are disposed of in line with local regulations. Some companies even offer light demolition services to remove structures like old sheds or built-in hot tubs. What might take a family weeks to finish can often be done by a professional team in just one or two days [4].
This level of thoroughness makes hiring professionals an easy decision for many.
How Green Light Junk Removal Can Help
Green Light Junk Removal specializes in full estate cleanouts, offering services tailored to these kinds of situations. Their team handles everything from standard furniture and appliance removal to specialty items like hot tubs and pianos, which require specific tools and expertise to remove safely without damaging the property.
They take care of the heavy lifting, sort items on-site to ensure usable goods are donated, and make sure recyclables are sent to the right facilities. With upfront pricing and the option to book online or request an on-site estimate, Green Light Junk Removal is a reliable choice. For families working under tight deadlines or managing the process from out of town, having a dependable crew to handle the entire job quickly and efficiently can make all the difference.
Final Steps to Prepare the Property
With sorting, disposal, and professional removal complete, it’s time to focus on getting the property ready for its next stage.
Final Walkthrough
Take one last tour of every room. Check every box, pocket, and cabinet to ensure nothing important is left behind.
"Open every box, empty every pocket, and check every cabinet. This ensures you don’t miss important items." – Prime Dumpster [9]
Inspect all storage areas thoroughly. Open appliances, cabinets, and drawers to look for any leftover cleaning supplies, paint cans, or chemicals that need proper hazardous waste disposal rather than being tossed in the trash [3]. Once you’ve confirmed everything has been cleared out, take photos of the empty spaces. These images can be useful for real estate agents, appraisals, or new occupants. Plus, having this documentation can help protect you in case of any disputes later on [16]. After confirming nothing remains, you can move on to cleaning and prepping the property.
Clean and Prepare the Property
Give every room a deep clean, ensuring closets and drawers are completely empty [8]. If the property is going on the market, go the extra mile – steam clean carpets, wipe down walls, and sanitize high-traffic areas like the kitchen and bathrooms [7]. Don’t forget the outside! Mow the lawn, remove debris, and make minor repairs to improve curb appeal. According to the National Association of Realtors, homes that are decluttered and well-maintained tend to show better and sell faster because buyers can more easily imagine themselves in the space [2]. A spotless, well-kept property also sends a message that the home has been cared for. Once everything is clean, you can finalize the handover process.
Coordinate with Real Estate Agents or New Occupants
Wrap up administrative tasks by changing the locks and arranging the key handoff with your real estate agent [17]. Schedule utility shut-offs or transfers only after all cleaning and repairs are done to avoid disruptions in service.
Share your post-cleaning photos and any receipts for professional services or repairs with your agent. This ensures everyone is on the same page and avoids confusion during the listing process [7]. As the National Association of REALTORS® explains:
"This step protects you and the client by minimizing confusion and keeping the project aligned through listing and beyond." [7]
Lastly, notify your homeowners’ insurance if the property will be vacant, and set up mail forwarding to the executor’s address [17][15].
Conclusion: A Straightforward Path to a Clean Estate
Tackling an estate cleanout becomes much easier when approached step by step: planning, sorting, responsible disposal, professional help, and final touches – even when emotions run high.
The key is starting with solid planning. A well-thought-out plan allows for a realistic timeline, often stretching over several weeks or months. Building in extra time from the outset helps avoid rushed decisions and unnecessary mistakes, ensuring the process is smoother and more manageable.
Equally important is handling disposal responsibly. Donating items in good condition, recycling whenever possible, and properly disposing of hazardous materials ensures the process stays compliant and environmentally friendly. Sorting, selling, and hauling each require their own strategies, but professional services can significantly ease the burden. For example, companies like Green Light Junk Removal can take care of the heavy lifting and eco-conscious disposal, allowing you to focus on the decisions that need your attention.
With careful planning and these organized, eco-friendly steps, what starts as a daunting task can turn into a well-managed and responsible transition.
FAQs
What should I do if family members disagree on who gets certain items?
When dealing with the distribution of inherited items, start by carefully reviewing the will and any specific bequests. This helps clarify who is entitled to what and avoids confusion. To keep the process equitable, you might try a round-robin selection method, where family members take turns choosing items, or use colored stickers to mark their preferences.
If disagreements persist, bringing in a neutral mediator or an estate sale professional can help manage the situation and ensure a smoother process. Finally, document the agreed distribution by taking photos of the items and their new owners. This creates a clear record, which can be helpful for estate purposes.
How do I handle valuables I might accidentally donate or throw away?
When preparing to declutter or move, it’s crucial to secure your important belongings. Go through each room methodically and set aside items like heirlooms, jewelry, and essential documents. These should be stored in a secure location, such as a locked room or your vehicle, to prevent accidental loss.
If you’re uncertain about the value of an item, consider reaching out to a professional appraiser for guidance. For items you’re unsure about keeping, use a designated "review bin" to revisit later. Finally, conduct a thorough double-check of all rooms and storage areas to ensure nothing of importance is inadvertently removed.
How much does professional estate cleanout help usually cost?
The cost of a professional estate cleanout usually falls between $275 and $4,000, with the national average landing around $1,250. For a typical 3-bedroom home, you can expect to pay anywhere from $500 to $2,500.
Several factors influence these prices, including the size of the property, the volume of items to be cleared, the amount of labor required, and any associated disposal fees. Most companies provide free, on-site estimates, giving you a clear, no-obligation quote before any work begins. Additionally, these expenses can often be reimbursed through the estate’s assets.