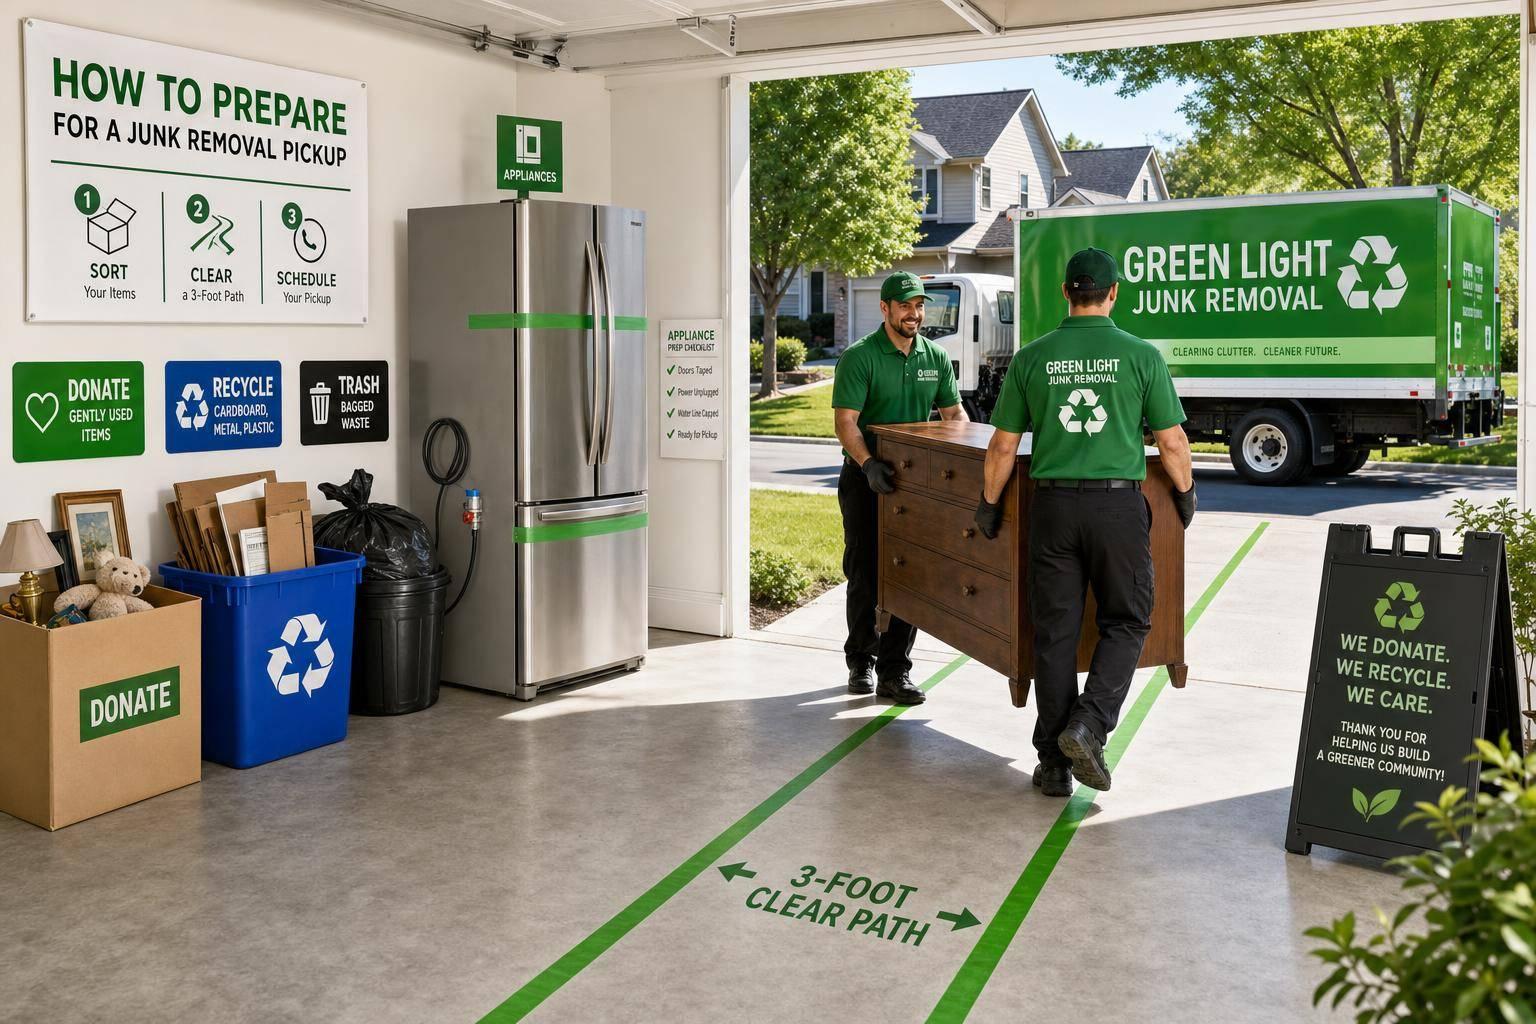
Most junk removal problems come from 3 things: mixed piles, blocked paths, and banned items left in the load. If I want pickup day to go smoothly, I sort everything first, set aside items the crew will not take, and clear a path that is at least 3 feet wide.
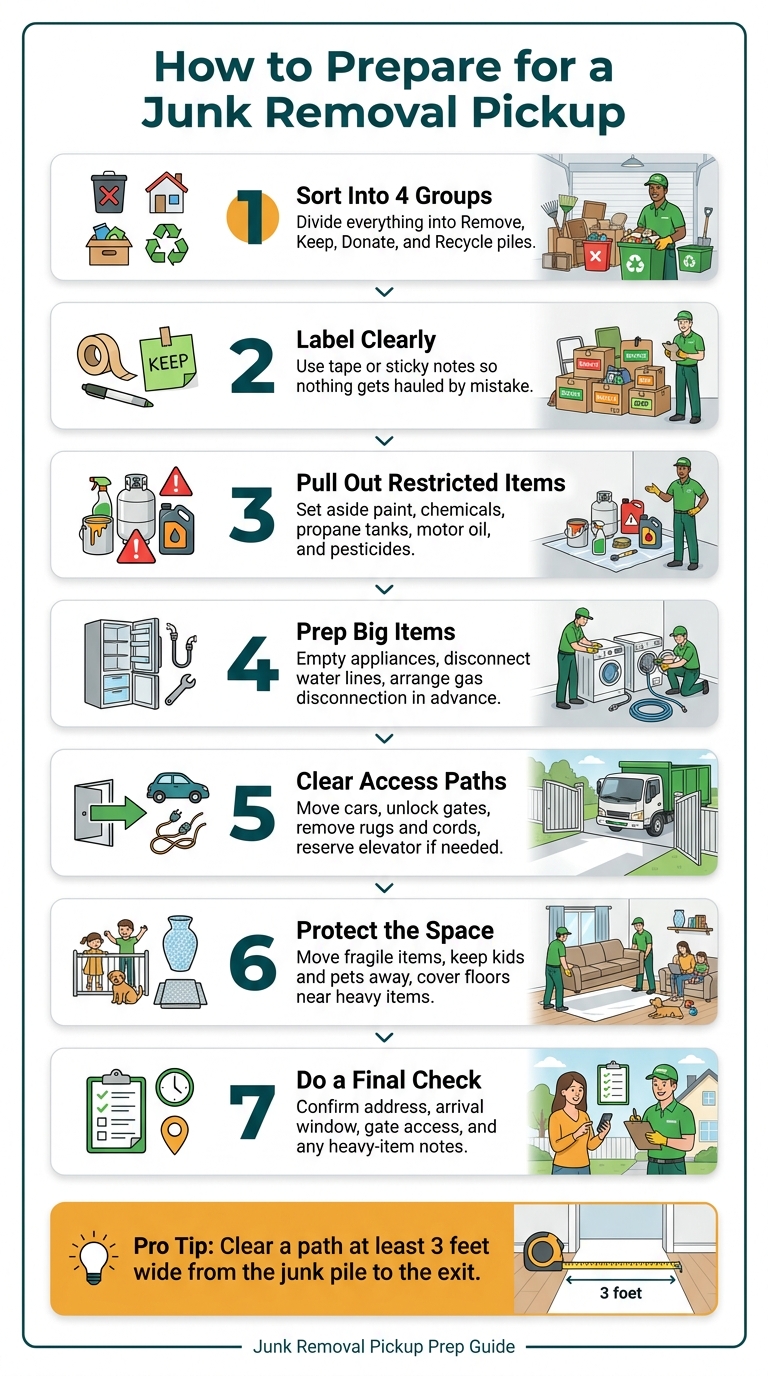
Here’s the short version:
- Sort into 4 groups: Remove, Keep, Donate, and Recycle
- Label clearly: use tape or sticky notes so nothing gets hauled by mistake
- Pull out restricted items: paint, chemicals, propane tanks, oil, and pesticides
- Prep big items: empty appliances, disconnect water lines, and arrange gas disconnection ahead of time
- Clear access: move cars, unlock gates, remove rugs and cords, and reserve the elevator if needed
- Protect the space: move fragile items, keep kids and pets away, and cover floors near heavy items
- Do one last check: confirm the address, arrival window, and any heavy-item notes
A little prep can cut delays, lower the chance of wall or floor damage, and make loading more direct. In most homes, the main goal is simple: make it obvious what goes, what stays, and how the crew gets it out.
If I were getting ready for pickup today, June 29, 2026, I’d focus on those steps first before worrying about anything else.
How to Prepare for a Junk Removal Pickup: 7-Step Checklist
Declutter & Demolish: Everything You Need to Know About Professional Junk Removal
sbb-itb-096ce5b
Sort Everything Before Pickup and Separate What Stays
Before pickup, sort everything into four clear piles: Remove, Keep, Donate, and Recycle. Keep those piles apart. That way, the crew can load the right items without second-guessing what stays and what goes.
Then walk through the property and separate items before the crew shows up. A little prep here can save a lot of confusion later.
Use a Room-by-Room System to Avoid Sorting Mistakes
Go through one space at a time – garage, attic, basement, yard, or spare bedroom. Make decisions in that room first, then move on to the next. It keeps the job easier to handle and cuts down on mix-ups between spaces.
A simple labeling system helps a lot. Use bright sticky notes or painter’s tape and mark items directly:
- "TAKE" for anything the crew should load
- "KEEP" for anything staying behind
This works especially well in rooms where only part of the furniture is leaving, like a home office or bedroom.
Also, empty drawers, cabinets, closets, bins, and appliances before pickup day. Those spots often hide paperwork, chargers, jewelry, or other small personal items that are easy to overlook. Box loose items, and bag up textiles so nothing gets scattered around.
Pick the method that makes the most sense for your space and the amount of stuff you’re clearing out.
Comparison Table: Ways to Organize Items Before the Crew Arrives
| Sorting Method | Best Use Case |
|---|---|
| Master List | Large estates or office cleanouts |
| Colored Labels / Sticky Notes | High-volume areas like garages or basements |
| Room-by-Room Walkthrough | Standard residential cleanouts |
| Physical Consolidation | Small to medium loads moved to a driveway or garage |
After everything is sorted, confirm what the crew can take and pull aside anything that isn’t allowed.
Confirm Accepted Items and Pull Out Restricted Materials
Once you’ve sorted everything, check what the crew can take and pull out anything they can’t. This step helps avoid delays and keeps pickup day from turning into a stop-and-start mess.
Items Commonly Accepted for Pickup
Most everyday household junk is usually accepted. That includes furniture like old couches, dressers, and tables; appliances like washers, dryers, refrigerators, and stoves; electronics like TVs and computers; and yard debris like branches, fencing offcuts, and bagged grass clippings.
Mattresses and box springs are also accepted in most cases. Bigger items like hot tubs, pianos, pool tables, and exercise equipment often need advance notice when you book. In some cases, they also need disassembly or an extra crew member or two.
Restricted Materials to Set Aside Before Pickup Day
Set restricted items aside before pickup day. Hazardous materials need separate disposal, and special-handling items need a bit of prep before the crew gets there.
Hazardous materials – leftover paint, motor oil, pesticides, solvents, and propane tanks – can’t go on a standard junk removal truck. You’ll need to take them to your local hazardous waste collection program or a municipal drop-off site. If you’re putting out laptops or smartphones, do a factory reset before pickup.
Reference Table: Accepted Items, Restricted Items, and Homeowner Prep Steps
| Item Category | Typical Status | Homeowner Action |
|---|---|---|
| Sofa / Furniture | Accepted | Clear a 3-foot-wide path to the exit; remove contents from drawers |
| Mattress / Box Spring | Accepted | Check if local law requires plastic wrapping for sanitation |
| Refrigerator / Freezer | Accepted (Special Handling) | Unplug 24 hours prior; remove all food; leave doors slightly open |
| Gas Stove / Dryer | Accepted (Special Handling) | Have a professional disconnect the gas line before pickup |
| Electronics (TV, Computer) | Accepted | Perform a factory reset; separate from general junk |
| Yard Debris | Accepted | Bundle branches with twine; bag leaves and grass clippings |
| Hot Tub / Piano | Accepted (Advance Notice) | Notify Green Light Junk Removal at booking; may need disassembly or extra crew |
| Paint Cans / Solvents | Restricted | Set aside; take to a local hazardous waste collection facility |
| Propane Tank | Restricted | Contact your municipality’s specialized disposal program |
| Motor Oil / Pesticides | Restricted | Keep separate; dispose of through a local hazardous waste facility |
Pull restricted items out of the pile now and keep them in a clearly separate spot. A corner of the garage or a labeled box works well. Then clear the access paths and work area so the crew can move everything out fast.
Prepare Access Paths, Large Items, and the Work Area
Once the load is sorted, clear the route to the exit. Start with the path, then get the items ready.
Clear Hallways, Driveways, Gates, and Stairways Before the Crew Arrives
Move your vehicles out of the driveway or away from the curb before the crew arrives so the truck can park as close to the load as possible. Unlock gates, garage doors, and side entrances ahead of time. If the property needs a gate code or elevator key, share that during booking so the crew doesn’t lose time waiting.
Inside the house, clear the path from the junk pile to the exit. Take away rugs, cords, lamps, bikes, and small furniture. Make sure basements and storage spaces have enough light so the crew can move heavy items on stairs safely. In older homes, narrow hallways and tight stairwells make this even more important [2]. A clean path helps the crew load faster and cuts down on trip hazards.
If you live in an apartment or condo, reserve the service elevator before pickup day. Many buildings require it [4].
Get Appliances and Bulky Items Ready to Move
Finish any last appliance prep before pickup day. For washing machines, turn off the water supply valves, disconnect the hoses, and drain any water left inside. Gas appliances like stoves, dryers, and water heaters need to be disconnected by a professional before pickup. Crew members do not disconnect gas lines on-site [3].
For large furniture like sectionals, bed frames, or exercise equipment, it can help to take them apart ahead of time if that’s practical. Measure oversized pieces before pickup to help avoid damage to walls and doorframes. Move fragile decor away from the removal path. Put cardboard or blankets on floors near heavy-load areas. Keep pets in a separate room, and keep children away from the work zone.
Next, separate anything reusable or recyclable.
Preparation Table: Tasks That Prevent Delays and Hauling Problems
These steps help avoid the most common delays and damage.
| Preparation Task | Benefit | When It Matters Most |
|---|---|---|
| Clear a path to the exit | Speeds loading and lowers trip risk | Narrow hallways, stairs, and cluttered garages |
| Move vehicles out of the driveway | Lets the truck park closer and cuts carry distance | Driveway pickups and homes with limited street parking |
| Unlock gates and entry points | Gives the crew immediate access without waiting for the homeowner | Backyard cleanouts, shed removals, and hot tub removals |
| Empty and disconnect appliances | Helps prevent leaks, spills, and extra weight during hauling | Refrigerators, freezers, and washing machines |
| Disassemble oversized furniture | Helps prevent wall and doorframe damage and makes loading easier | Bed frames, sectionals, and large exercise equipment |
| Secure pets and children | Keeps everyone safe while heavy items are being moved | Every appointment, especially when gates or front doors stay open |
| Reserve the service elevator | Prevents the crew from being turned away at the building | Apartment and condo removals |
Separate Donations and Recyclables, Then Do a Final Check
Set Aside Reusable and Recyclable Items Before Pickup
Once you’ve sorted the main load, pull out anything that should be donated or recycled so the crew only takes what’s meant to go.
Before pickup, make separate Donate and Recycle piles. Keep landfill items with the main junk load. In mixed-use spaces, label each group with bright sticky notes, colored tape, or a permanent marker so there’s no mix-up.
Gently used furniture, working appliances, and decor in good shape are solid donation picks. For bulky items, call ahead and make sure the charity will take them. On the recycling side, bundle cardboard with twine, stack scrap metal on its own, and keep electronics away from general junk. That one step can cut down what ends up in the truck.
Put small, loose items in sturdy, sealable bags or boxes to help stop leaks and spills during transport.
Disposal Table: Donation, Recycling, Landfill, and Required Prep
Use the table below to sort each item fast.
| Disposal Category | Common Item Examples | Preparation Required |
|---|---|---|
| Donation | Gently used couches, working appliances, clothing, decor | Clean items; confirm charity acceptance; group together |
| Recycling | Scrap metal, clean cardboard, electronics | Remove personal data; bundle cardboard with twine; separate e-waste |
| Landfill | Broken furniture, non-recyclable materials, general debris | Bag loose debris |
| Restricted | Paint, chemicals, batteries, propane tanks, appliances containing refrigerant | Keep separate for hazardous waste disposal |
Conclusion: A Short Readiness Checklist Before the Truck Arrives
Before the truck shows up, do one last walkthrough and check these off:
- Decide what stays – move "keep" items to a separate room or a marked "do not remove" zone.
- Confirm accepted items – make sure everything on your removal list is approved.
- Remove restricted materials – set aside paint, chemicals, propane tanks, and batteries for proper disposal.
- Clear access – hallways, driveways, gates, and stairways should be open and free of clutter.
- Prep heavy items – disassemble oversized pieces and prep appliances where it makes sense.
- Label donations and recyclables – keep them easy to spot and away from the main junk load.
Do a quick pass through the attic, basement, garage, and yard to make sure nothing was missed [1]. Then confirm the address, arrival window, gate access, and any heavy-item notes.
FAQs
Do I need to be home for the pickup?
In most cases, yes. Being there at the start helps a lot. You can walk through the space, point out what needs to go, and approve the final scope of work before the crew starts loading.
Can’t be home? Reach out to your provider ahead of time and set things up in advance. Clear instructions can do the trick, especially if you label items with sticky notes or painter’s tape.
What if I accidentally leave a restricted item in the pile?
If you accidentally leave a restricted item in your junk pile, the removal team may not be able to take it. Safety rules and disposal laws often prevent crews from loading certain materials.
Set aside hazardous items ahead of time, such as paint, chemicals, and propane tanks. Then use your local municipality’s hazardous waste program for proper disposal.
Not sure about something? Check with your junk hauler before pickup. That small step can save you a last-minute headache.
How early should I start preparing before pickup day?
Start preparing a day or two before your scheduled pickup. That gives you enough time to walk through your home, attic, basement, and garage and figure out what needs to go without making rushed, last-minute calls.
During that time, sort keepers from haul-away items, disconnect appliances, and clear paths. That makes pickup faster, safer, and easier for everyone involved.