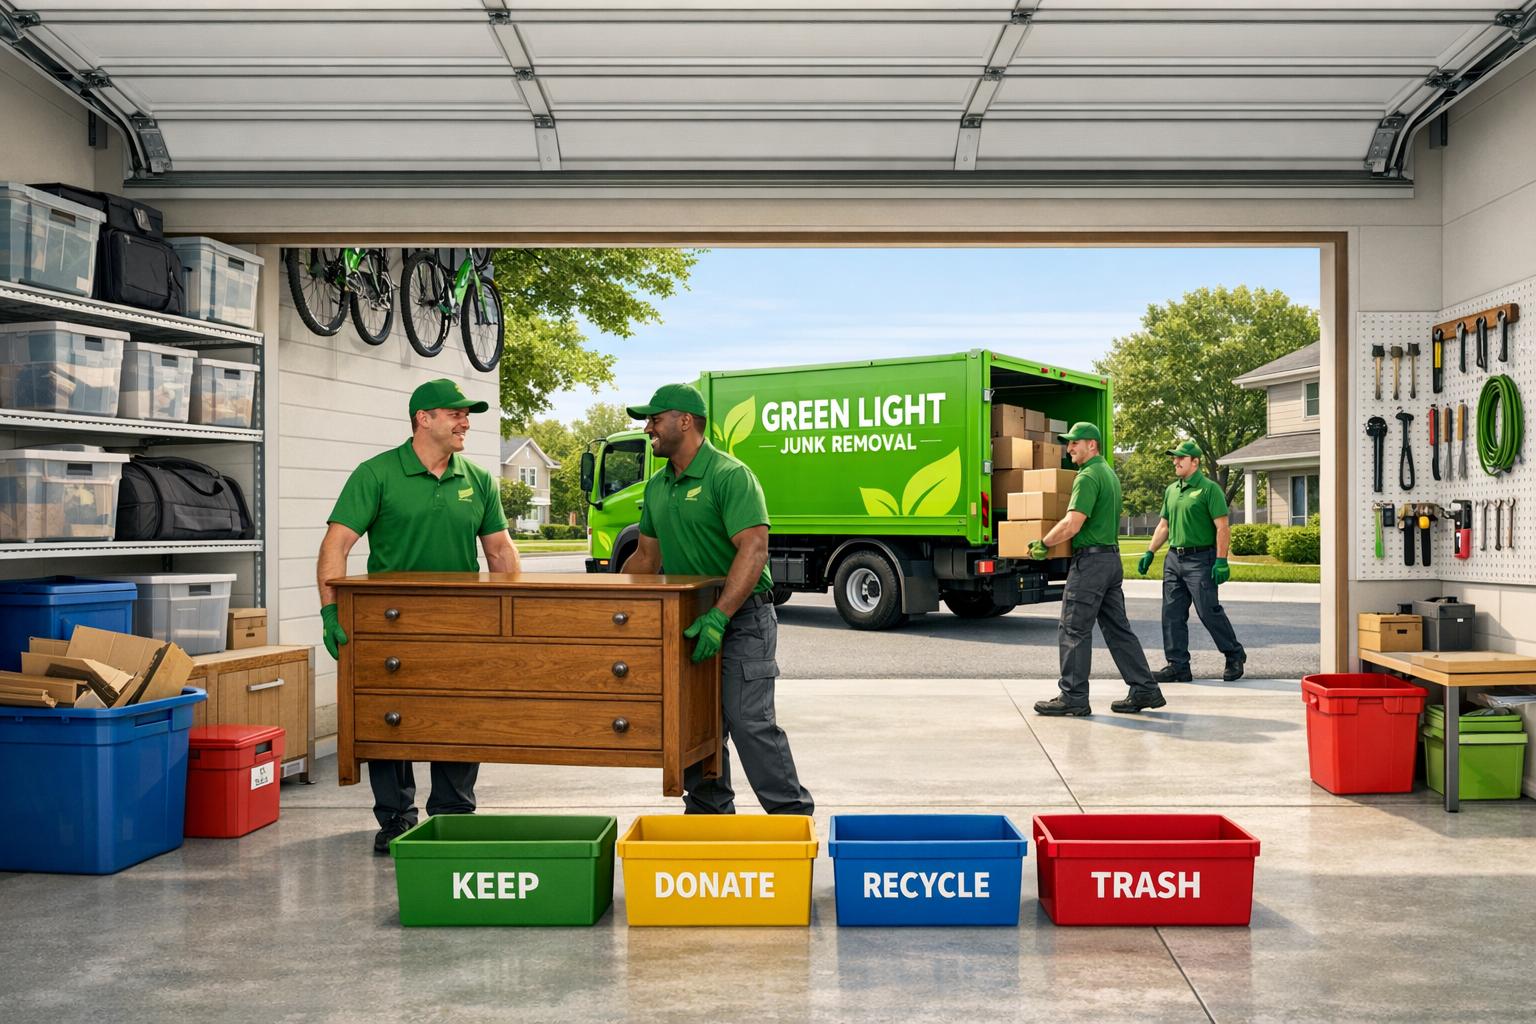
Your garage doesn’t have to stay cluttered. In fact, 25% of two-car garages in the U.S. are so packed they can’t fit a single car. With a simple plan, you can clear out your garage in a weekend and turn it into a functional space.
Here’s how to do it:
- Prepare Supplies: Gather sorting containers, heavy-duty trash bags, cleaning tools, and safety gear. Set up a staging area like your driveway.
- Sort Items: Use the four-box method: Keep, Donate, Sell, Trash. Follow the 12-month rule – if you haven’t used it in a year, let it go.
- Dispose Properly: Recycle or safely discard hazardous materials like old paint or batteries. Schedule donation pickups or junk removal services to clear out unwanted items.
- Deep Clean: Sweep, mop, and scrub your garage from top to bottom. Address any repairs like cracks or loose shelving.
- Organize Smartly: Install wall-mounted storage, ceiling racks, and labeled bins. Divide your garage into zones for tools, seasonal items, and daily essentials.
- Maintain Order: Stick to a cleaning schedule, return items to their designated spots, and keep a donation bin handy for future decluttering.
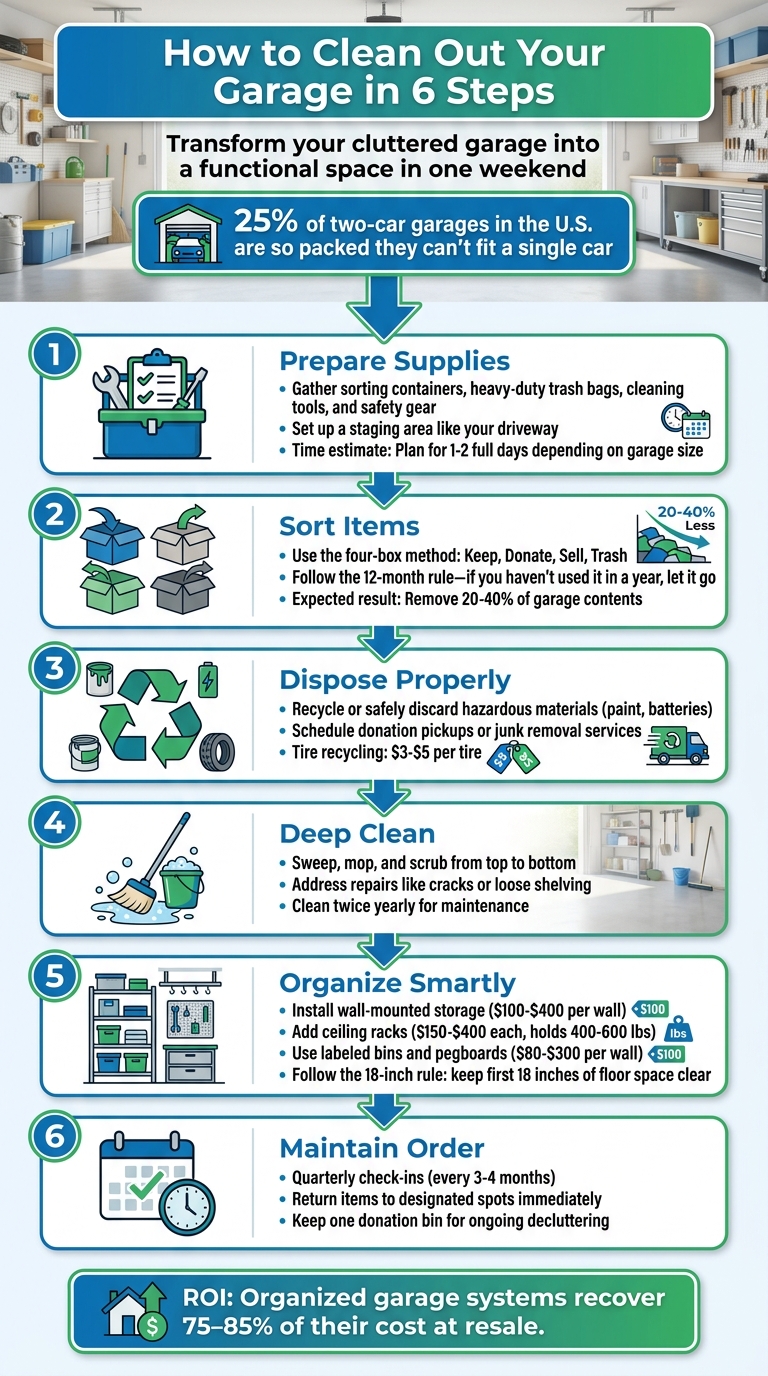
6-Step Garage Cleanout Process: From Cluttered to Organized
Garage Declutter (Top Tips for Tackling Scary Spaces!)
sbb-itb-096ce5b
Getting Ready for Your Garage Cleanout
Proper preparation is key to making your garage cleanout efficient and stress-free. Depending on the size of your garage and how much you’ve stored over the years, this process could take a full day – or even two [4]. Jumping in without a clear plan or the right tools often leads to frustration and unfinished work. But with some planning and the right supplies, you’ll be ready to tackle the clutter head-on.
Gather Your Cleaning Supplies
Start by collecting everything you’ll need for sorting, cleaning, and staying safe. Here’s a quick checklist:
- Sorting containers: Use boxes or bins to create categories like "keep", "donate", "sell", and "trash."
- Heavy-duty trash bags: Essential for broken or unwanted items.
- Cleaning tools: A broom, mop, and rags to clean once the garage is cleared.
- Protective gear: Chemical-resistant gloves for handling hazardous items, an N95 mask to protect against dust and mold, and safety goggles for overhead cleaning.
Other helpful items include an all-purpose cleaner, markers and labels for organizing bins, and basic hand tools like screwdrivers and pliers for disassembling large items. If possible, set up a designated outdoor area – like your driveway – for sorting. This keeps the process organized and gives you more room to work.
Make a Cleaning Plan
Once you’ve got your supplies ready, map out your approach. Divide your garage into 4–6 zones, such as the front-left corner, workbench area, or back wall. Focusing on one zone at a time helps you maintain momentum and avoid feeling overwhelmed.
Keep your energy up by working in 45-minute intervals, followed by 15-minute breaks. Pick a dry weekend with mild weather [5], since you’ll likely need to use your driveway as a staging area. To streamline the process, schedule donation pickups or junk removal services in advance, so unwanted items are cleared out quickly.
"The garage isn’t really the problem. It’s the lack of a clear plan. Without one, even a motivated weekend warrior ends up shuffling piles from one corner to another." – Jiffy Junk Team [3]
With a solid plan and supplies in place, you’ll be ready to transform your garage into a clean, organized space.
Sorting and Decluttering Your Items
With your space prepped and supplies ready, it’s time to make decisions about what stays and what goes. Having a clear system in place is crucial – skip the temptation to create a "maybe" pile.
Use the Four-Box Method
Set up four containers labeled "Keep", "Donate", "Sell", and "Trash" [7]. For garages, tweak this system to include categories like "Keep in garage", "Relocate", "Sell/Donate," and "Trash/Recycle". This adjustment helps pinpoint items that don’t belong in the garage – like old tax documents, childhood keepsakes, or extra kitchen gadgets that require more stable conditions than a garage typically offers [2].
Follow the 12-Month Rule: if you haven’t used something in a year, it’s time to let it go [2]. Assess each item’s usefulness, factoring in its replacement cost and the space it occupies. Many homeowners discover they can part with 20% to 40% of their garage contents during a thorough decluttering session [2]. Once sorted, move donation and sale boxes directly to your car. This ensures they leave your home quickly, avoiding the risk of items creeping back into the clutter [7].
"If you haven’t used it in a year, do you really need it?" – Hillary Forst, Professional Organizer, Sorted & Styled [7]
Group Items by Category
As you sort, organize your belongings into logical categories: hand tools, sports gear, seasonal decorations, automotive supplies, camping equipment, and cleaning products [2]. This method simplifies storage planning and helps you spot duplicates or unnecessary items. Think about how you’ll use your garage moving forward and create designated zones, such as:
- Active Zone: For frequently used items.
- Workshop Zone: For power tools and project materials.
- Bulk Storage: For seasonal or infrequently used items.
- Transition Zone: Near the door for everyday essentials like shoes and coats [2].
After grouping, focus on responsibly disposing of items that didn’t make the cut.
Dispose of Unwanted Items the Right Way
For hazardous materials like oil-based paint, pesticides, old gasoline, or lithium-ion batteries, contact your local household hazardous waste program [2][8]. Latex paint can be dried out with cat litter and safely discarded with regular trash [2]. Auto parts stores often accept car batteries for free, while electronics should go to e-waste recycling programs or retailer take-back services [2].
If you’re dealing with scrap metal (like old shelving or toolboxes), reach out to a metal recycling facility. Recycle clean, dry cardboard and rigid plastics (#1, #2, #5) without bagging them for smoother processing [9]. For old tires, many retailers accept them for recycling, typically charging $3 to $5 per tire [2].
For larger volumes of junk – such as broken furniture or water-damaged items – companies like Green Light Junk Removal can handle the heavy lifting. They’ll ensure recyclable and reusable materials are dealt with responsibly.
With your items sorted and unwanted materials properly disposed of, you’re ready to move on to cleaning and organizing your garage space.
Cleaning the Garage Space
Once you’ve sorted and cleared everything out, your now-empty garage becomes the perfect canvas for a deep clean before reorganizing.
Clean Floors and Surfaces
Start by tackling the high spots – use a long-handled duster to sweep away cobwebs from the ceiling and corners. Next, wipe down walls and shelves with a mix of water and detergent to keep dust at bay. When it comes to the floor, mop with a simple solution of equal parts distilled white vinegar and hot water [10]. For oil stains, try a grease-fighting dish soap or a paste made from lemon juice and baking soda, scrubbing with a stiff brush. Stubborn stains might need a bit more muscle – apply oven cleaner, let it sit for 5–10 minutes, then scrub and rinse [11]. For heavy-duty cleaning, mix 1 ounce of Trisodium Phosphate (TSP) with 1 gallon of hot water, but don’t forget to wear protective gear like gloves, long sleeves, and safety goggles [10].
"Your garage cleaning routine should start from the top down, sweeping cobwebs from ceilings before tackling walls, shelves, and floors." – Tyler Lacoma, Contributing Writer, Angi [10]
If odors from spills linger, sprinkle baking soda or cat litter over the area to soak up moisture and neutralize smells. Use a shop vac or a squeegee to remove excess water and help the space dry faster.
Once the floors and surfaces are sparkling, it’s time to focus on ensuring the structure and features of the garage are in tip-top shape.
Check for Repairs or Maintenance
Take advantage of the empty space to inspect for potential problems. Look for cracks in the concrete, damage to drywall, exposed wires, or signs of pests. Seal any gaps, repair cracks, and secure loose shelving. While you’re at it, check the garage door’s moving parts and lubricate the hinges to keep everything running smoothly. This step not only improves functionality but also makes the space safer for future use.
Organizing Your Garage
Now that your garage is clean and repaired, it’s time to set up storage systems that make everything easy to access and keep the floor clear. A well-organized garage isn’t just about tossing things into bins – it’s about creating zones and using vertical space efficiently so you can actually park your car inside.
Install Storage Solutions
To make the most of your garage, focus on vertical storage. Wall-mounted track systems, which cost between $100 and $400 per wall, allow you to move hooks and baskets around as needed. For hand tools, metal pegboards are a great choice. They cost about $80 to $300 per wall and are roughly ten times sturdier than fiberboard alternatives, keeping tools visible and within reach [2]. Ceiling racks, priced at $150 to $400 each, are perfect for bulky, seasonal items like holiday decorations or camping gear. A typical 4×8-foot ceiling rack offers 32 square feet of storage and can hold between 400 and 600 pounds [2].
Transparent bins are another must-have. They let you see what’s inside without digging through each box. IKEA’s SAMLA transparent boxes are an affordable option [12]. Be sure to label each bin on at least two sides, and if bins are stored overhead, label the bottom for quick identification. Stick to the 18-inch rule: keep the first 18 inches of floor space along every wall clear. This ensures easy access to wall storage and maintains safe walking paths [2].
Once your storage systems are installed, start grouping items into zones to make daily use more convenient.
Group Similar Items Together
Divide your garage into zones based on how frequently items are used. Near the house entry, create a Transition Zone for shoes, coats, backpacks, and keys – things you grab every day. Along the side walls, set up an Active Zone at a height between your knees and head, where you can store tools, sports gear, and cleaning supplies used weekly. Overhead ceiling racks are best for the Bulk Storage Zone, which can hold seasonal decorations, luggage, and camping equipment until needed.
For hazardous materials like gasoline, paint, or pesticides, use a locked metal cabinet placed away from ignition sources like water heaters. To streamline the setup process, start by installing ceiling racks, then move on to wall systems, and finally organize the transition zone near the door [2].
These zones will help you maintain an organized garage over time, setting the stage for long-term success in the next steps.
Keeping Your Garage Clutter-Free
Now that your garage is organized, the key to preserving that order lies in developing consistent habits. Stick to the 18-inch rule, which helps keep walkways clear and prevents clutter from creeping back in.
Make it a point to return items to their designated spots immediately after use. For example, hang that toolbox back on the pegboard or place sports gear in its assigned bin instead of leaving it on the floor. To avoid chaos, limit yourself to one miscellaneous bin – and make it a rule to sort through it once it fills up. These small, daily actions will reinforce the organization you’ve worked so hard to achieve.
Set Up a Regular Cleaning Schedule
Every three to four months, schedule quarterly check-ins to tidy up the space. This includes sweeping the floors, clearing cobwebs, and identifying items that no longer belong. Go a step further by mopping the garage floor at least twice a year to keep it looking clean and fresh [6].
Seasonal rotation of items is another smart approach. In spring, move winter gear like snow shovels to higher shelves and bring gardening tools within reach. Reverse the process in the fall. Also, keep a dedicated donation bin in the garage, and make it a habit to empty it regularly. This way, you can avoid a buildup of items you no longer need.
Use Green Light Junk Removal for Future Needs
Sometimes, despite your best efforts, larger accumulations can happen. When that’s the case, calling in professional help can make all the difference. Green Light Junk Removal specializes in handling these situations, offering services like appliance removal, yard waste cleanup, and seasonal decluttering. Their team typically completes standard jobs in under an hour and provides scheduling within 24 to 48 hours – often with same-day availability [1].
Hiring professionals can help you avoid what experts refer to as "garage relapse", where sorted items linger too long and eventually blend back into the clutter.
"The biggest mistake people make? Letting the ‘junk pile’ sit there for weeks" [1]
Green Light Junk Removal also emphasizes eco-friendly practices, donating usable items to local charities and recycling materials to minimize landfill waste. To ensure a smooth process, schedule their services for the final afternoon of your weekend cleanout. This way, all unwanted items are swiftly removed, leaving your garage clutter-free [1].
Conclusion
A well-thought-out plan – starting with clearing out, sorting using the four-box method, and organizing by zones – can turn a chaotic garage into a practical, valuable part of your home. The secret lies in staying committed to the process and being honest about what you truly need. If you haven’t used something in the past year, chances are you won’t need it [2].
Taking back control of your garage brings more than just convenience; it can also boost your home’s market appeal. Did you know that roughly 25% of homeowners with two-car garages can’t park a single car due to clutter? Additionally, organized garage systems can recover 75% to 85% of their cost when it’s time to sell [2].
Here’s how to make it happen: Start with preparation, focus on one section at a time, and don’t let sorted items pile up. Arrange for junk removal or donation pickups as soon as possible, and aim for eco-friendly solutions to prevent clutter from creeping back in [1].
Once your garage is in order, simple habits like the 18-inch rule and quarterly check-ins can help you maintain it. And for those bigger cleanouts or heavy lifting jobs, Green Light Junk Removal offers eco-conscious disposal options to make the process easier.
So, block off a weekend, gather your supplies, and get started. Your future self – and your car – will be glad you did.
FAQs
How do I decide what to keep if I’m stuck?
If tackling your garage feels overwhelming, start by sorting items into groups based on how useful they are and how often you actually use them. A good rule of thumb? If something hasn’t been used in over a year, it’s probably time to part ways. Consider donating, recycling, or discarding those items. Ask yourself: Does this serve a purpose or hold real sentimental value? Be honest – if the answer is no, it’s time to let it go and reclaim that space.
What’s the safest way to get rid of paint, batteries, and chemicals?
Properly getting rid of paint, batteries, and chemicals is essential for keeping both people and the environment safe. Use household hazardous waste (HHW) collection programs for these items. Reach out to your local waste management or environmental agency to find drop-off centers or upcoming collection events in your area.
When dealing with lithium-ion batteries, be sure to tape their terminals and place them in separate bags to avoid fire hazards. And remember – never pour chemicals down the drain or toss them in the regular trash. Doing so can harm the environment and create serious health risks.
Which storage upgrades give the biggest impact fast?
Maximizing your garage storage can be easier than you think with a few smart upgrades. Some of the quickest wins include setting up organized zones and installing practical storage systems like wall-mounted shelves, ceiling racks, and modular bins. These options make the most of vertical space, help clear out clutter, and ensure everything is easy to access.
To get started, focus on dividing your garage into specific zones based on what you store – tools, sports gear, seasonal items, and so on. Once you’ve mapped out those zones, you can add the right storage solutions to keep everything in its place. Pairing these upgrades with a good decluttering session can bring noticeable results in no time.