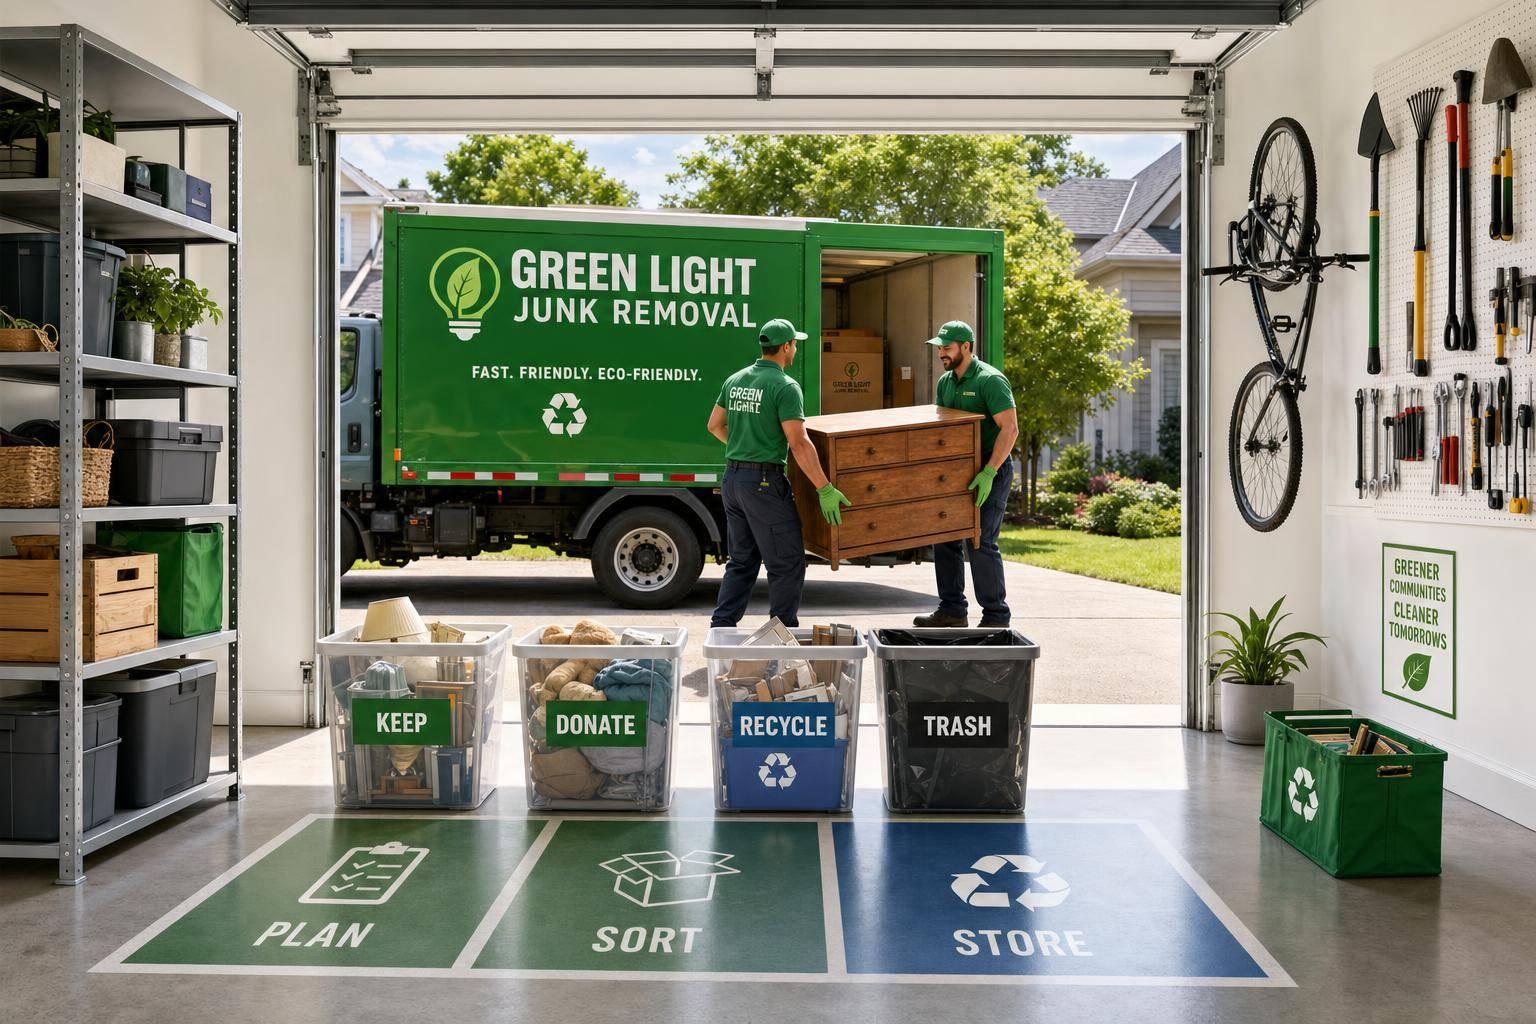
You can clear many garages in one day if you sort fast, limit decisions, and remove junk the same day.
When I want a garage cleanout to stay on track, I do three things first: set a time limit, split the space into 3–5 zones, and line up trash, donation, recycling, and hazardous-waste drop-off before I start. A single-car garage often takes 4–6 hours. A two-car garage can take about 8 hours. Packed garages may take the full weekend.
Here’s the short version:
- I decide what the garage is for now: parking, storage, or a work area
- I sort everything into keep, donate, recycle, and junk
- I start with large items to open floor space fast
- I pull out paint, oil, batteries, and chemicals first because they need special handling
- I clean the empty garage from back to front
- I put back only what has a clear spot on shelves, hooks, bins, or racks
- I move donation, recycling, and junk out that day
A few rules make the job easier. I work one zone at a time for 20–30 minutes, touch items once when I can, and use a simple test: if I have not used it in 12 months, and it is not seasonal or personal, it probably should not stay. I also keep a 3-foot path clear near the electrical panel and water heater.
| Garage Type | Usual Time | Main Goal | Best Approach |
|---|---|---|---|
| Single-car | 4–6 hours | Clear space fast | Sort by zone and remove junk same day |
| Two-car | About 8 hours | Reset storage and parking | Use driveway staging and timed work blocks |
| Overfilled garage | 1 weekend | Cut volume first | Start with bulky junk and special-waste items |
This article boils the job down to a plain system: plan first, sort fast, clean the empty space, and do not let junk sit around for “later.”
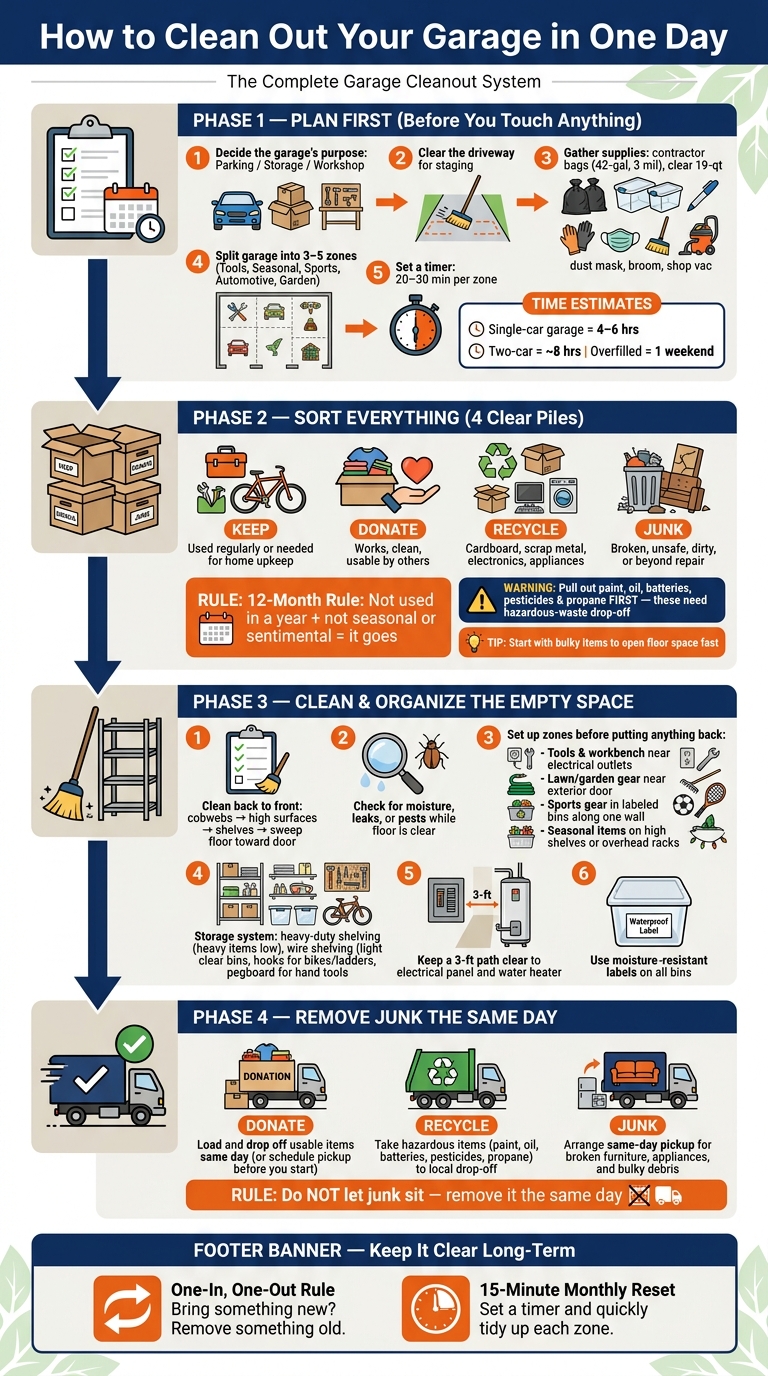
How to Clean Out Your Garage in One Day: Step-by-Step System
Declutter Your Garage FAST – Anyone Can Do This! #garageorganization
sbb-itb-096ce5b
Plan Before You Move Anything
Before you touch a single box, decide what the garage needs to do now: park a car, hold a workshop, or handle seasonal storage. That one choice makes sorting a lot easier and stops the whole project from wandering off track. Put time on your calendar, clear the driveway, and decide the garage’s job before you sort. Once that’s set, move right into zones and piles.
Set a Time Limit and Work in Zones
Split the garage into 3–5 functional zones before you move anything. Common zones include tools, seasonal storage, sports gear, automotive supplies, and gardening equipment. Give each zone 20–30 minutes [2]. That time cap helps you keep moving and cuts down on going back through the same stuff twice.
Start at the top and work down. Do shelves and wall-mounted items first, then finish with the floor, so dust and debris fall before the final sweep. Use the driveway as a staging area so you can sort in daylight. Set items outside, tackle one zone at a time, and sort each area into clear keep, donate, recycle, and junk piles.
Gather Your Supplies Before You Start
Get your supplies together before you begin. Bring only what you need:
- Heavy-duty contractor bags – 42-gallon, 3 mil thickness [1]
- Clear lidded storage bins – 19-quart bins fit standard wire shelving [1]
- Permanent markers and labels – use a label maker if you’re setting up more than 12 bins [1]
- Work gloves, dust mask, broom, and shop vacuum
Set aside old paint, motor oil, batteries, and chemicals first. These need specialized disposal and should not go in regular trash or dumpster loads [4][3]. With the right supplies ready to go, the cleanout can move fast.
Sort Everything Into Four Clear Categories
Start by sorting each zone into four piles and keep the momentum going. Touch each item once and make one clear call right then. Move zone by zone so the garage gets more open as you go.
Use Keep, Donate, Recycle, and Junk Piles
Put every item into one of four piles: keep, donate, recycle, or junk.
- Keep: You use it often, or it matters for home upkeep.
- Donate: It still works, it’s clean, and someone else could use it.
- Recycle: This includes cardboard, scrap metal, electronics, and appliances that should go to a recycling center.
- Junk: Use this for anything broken, unsafe, dirty, or past fixing.
If you get stuck on an item, skip it and keep moving. And here’s a simple rule: if you haven’t used it in a year, and it has no seasonal or sentimental reason to stay, it doesn’t need a spot in the garage.
Make Quick Decisions on Common Garage Items
Begin with bulky stuff. That opens up floor space fast, which makes the rest of the job feel a lot easier.
Keep the tools you still use. Donate doubles. Recycle broken metal parts. Flatten cardboard boxes as soon as you find them, and only save a small number for current storage needs.
With sports gear, donate anything usable that you’ve outgrown or stopped using. If safety gear is damaged, send it straight to junk. For yard equipment, keep what still runs and donate working items you no longer want.
Lay oily rags flat outdoors to dry before disposal; never leave them piled in the garage.
Old paint, pesticides, chemicals, automotive fluids, and lithium-ion batteries should never go into regular trash. Tape battery terminals before transport, then take batteries to a battery recycler or e-waste center.
Comparison Table: What to Do With Common Garage Items
| Item Category | Keep | Donate | Recycle | Junk |
|---|---|---|---|---|
| Old Tools | Working/frequently used | Working but unneeded | Broken metal tools | Plastic/broken parts |
| Furniture | High-quality/needed | Clean and usable | Metal frames/parts | Stained/broken/moldy |
| Boxes | Limited number for storage | – | Flattened cardboard | Wet/contaminated |
| Sports Gear | Currently used | Outgrown/good condition | – | Damaged/unsafe |
| Yard Gear | Working mowers/tools | Working/unneeded | Scrap metal parts | Broken or gas-leaking |
| Bulky Junk | – | Working appliances | Metal appliances/e-waste | Broken furniture/debris |
Organize What Stays So the Garage Remains Usable
Once you’ve pulled out the keep pile, clean the garage before you put anything back. It’s much easier to set things up in an empty space than to work around boxes, tools, and random clutter.
Clean the Empty Space From Back to Front
Start at the back wall and work toward the exterior door. Take down cobwebs from the ceiling and walls first. Then wipe shelving and clean high surfaces before low ones.
After that, sweep debris toward the door so it goes out of the garage instead of getting pushed around again. While the floor is clear, check for moisture, leaks, or pests. That quick check can save you a headache later.
Use Shelves, Clear Bins, Hooks, and Labels
Set up your storage system before anything goes back in. That way, every item has a set place the moment it comes back into the garage.
Break the garage into zones that match how you use it:
- Tools and a workbench near electrical outlets
- Lawn and garden equipment near the exterior door
- Sports gear in labeled bins along one wall
- Seasonal items on higher shelves or overhead racks mounted to ceiling joists
Use heavy-duty shelving for heavy items, wire shelving for lighter gear, clear bins so you can see what’s inside, hooks for bikes and ladders, and pegboard or slatwall for hand tools. Put the heaviest items on lower shelves, and move lighter, less-used items up high.
Use moisture-resistant labels so bins stay readable in garage conditions. Keep a 3-foot path to the electrical panel and water heater, and anchor heavy storage into studs.
Once every item has a zone, move the donation and recycle piles out right away.
Remove Junk the Same Day and Keep the Garage Clear
Use Donation, Recycling, and Green Light Junk Removal for Same-Day Disposal
With the keep pile stored, move everything else out right away. The goal is simple: take each pile straight to its final stop instead of letting it sit in the garage again.
For donations, load usable items into your vehicle and drop them off the same day. If that’s easier, schedule one pickup before you start sorting.
For recyclables, pull out paint, oil, batteries, pesticides, and propane tanks and take them to a local hazardous-waste drop-off.
For bulky items, use same-day pickup for broken furniture, appliances, and construction debris. Green Light Junk Removal handles same-day pickup for broken furniture, appliances, and construction debris. Upfront pricing keeps bulky-item pickup simple.
Use donation for usable items, recycling for accepted materials, and professional pickup for heavy or oversized debris.
Conclusion: Keep the Process Simple and Repeatable
Once the garage is clear, stick with two simple habits: a one-in, one-out rule and a 15-minute monthly reset.
FAQs
What if I can’t finish in one day?
If you can’t finish in one day, don’t leave the project half-done. That can make the garage feel more discouraging than when you started. Give yourself a full weekend – or even three days if the garage is large and packed tight.
To keep things moving, use a clear system and sort out your disposal plan before you begin. If you need to pause, get the donate and recycle piles out within 48 hours so they don’t just sit there and slow you down.
How do I handle sentimental items quickly?
Set aside one small box for sentimental items. That limit matters. It gives nostalgia a place to live without letting it slow you down or take over the garage.
If something doesn’t have a clear seasonal purpose or sentimental meaning, and you haven’t used it in more than a year, let it go. Sticking to that one-box rule makes it easier to keep moving.
When should I rent a dumpster or book junk removal?
It comes down to your schedule, your physical ability, and the amount of debris you need to get rid of.
Rent a dumpster if the job will take a few days or more, you want to move at your own pace, and you can load everything yourself. It also helps if you have room in your driveway for the container.
Book junk removal if you want the job done fast and with less effort on your end. It’s a good fit for packed garages, heavy items, or a cleanout you want finished in one shot.